How-To:PDF Template: Difference between revisions
No edit summary |
No edit summary |
||
| Line 1: | Line 1: | ||
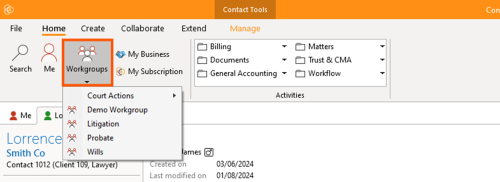
# The starting point of creating templates is you must have a workgroup or you may select an existing workgroup in the application. [[File:Step 1 - Create Template.png|none|thumb|500x500px]] | # The starting point of creating templates is you must have a workgroup or you may select an existing workgroup in the application. [[File:Step 1 - Create Template.png|none|thumb|500x500px]] | ||
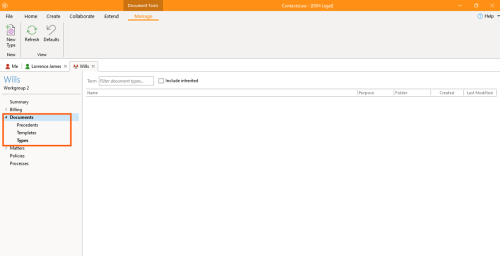
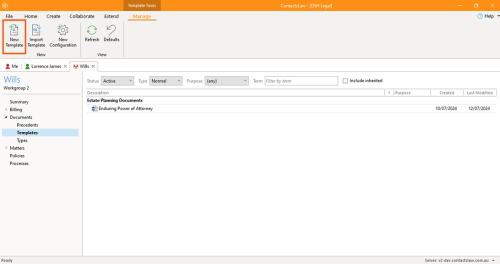
# Then you may proceed to the “'''Documents'''” section and choose “'''Templates'''”. Then click, “'''New Template'''”.[[File:Step 2.1- Create Template.png|none|thumb|500x500px]] | # Then you may proceed to the “'''Documents'''” section and choose “'''Templates'''”. Then click, “'''New Template'''”.[[File:Step 2.1- Create Template.png|none|thumb|500x500px|[[File:Step 2.2- Create Template.png|none|thumb|500x500px]]]] | ||
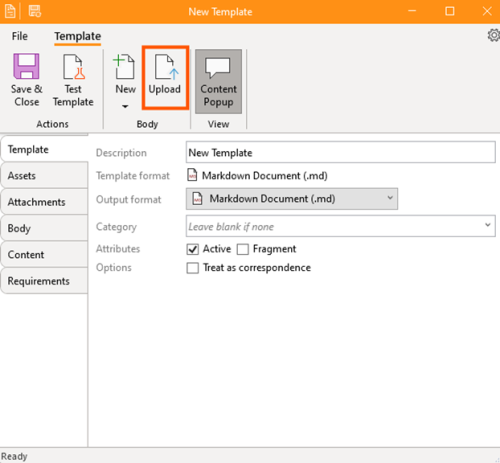
# Since you are creating a PDF template, just click the “Upload” and choose the PDF file you want to upload. [[File:Step | # Since you are creating a PDF template, just click the “Upload” and choose the PDF file you want to upload. [[File:Step 3 - PDF Template.png|none|thumb|500x500px]] | ||
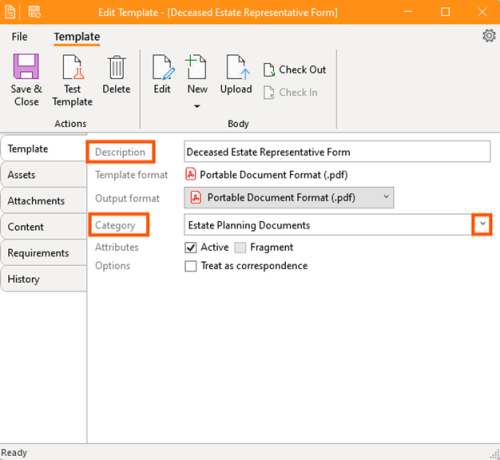
# After uploading the PDF, change the description and the category of the template you are creating. [[File:Step | # After uploading the PDF, change the description and the category of the template you are creating.[[File:Step 4 - PDF Template.png|none|thumb|500x500px]] | ||
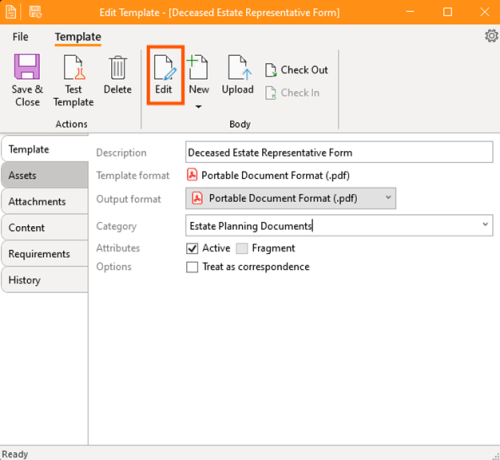
# | # Now let’s proceed to “'''Edit'''” to prepare what details are needed from the third party which this process is called, “'''Setting up PDF Template'''”. [[File:Step 5 - PDF Template.png|none|thumb|500x500px]] | ||
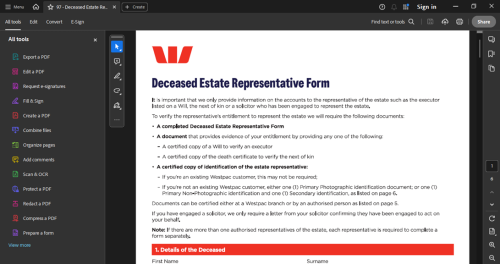
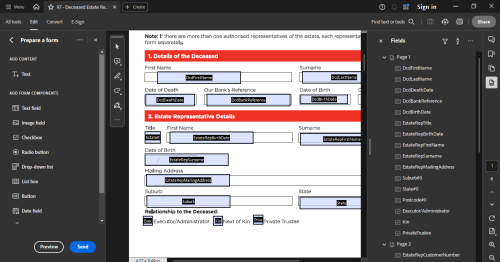
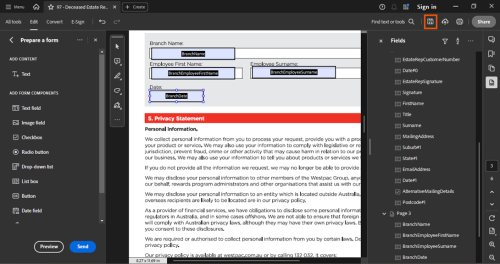
# | #In order to edit the fields in the template, we recommend using Adobe Acrobat. Once you've made your desired changes, you will be redirected to the Adobe Acrobat interface where you can fully change or edit the fields that need to be filled in by the third party.[[File:Step 6.1 - PDF Template.png|none|thumb|500x500px|[[File:Step 6.2 - PDF Template.png|none|thumb|500x500px]]]] | ||
# | # Once the desired fields for third-party input have been finalized, simply click "'''Save'''". [[File:Step 7 - PDF Template.png|none|thumb|500x500px]] | ||
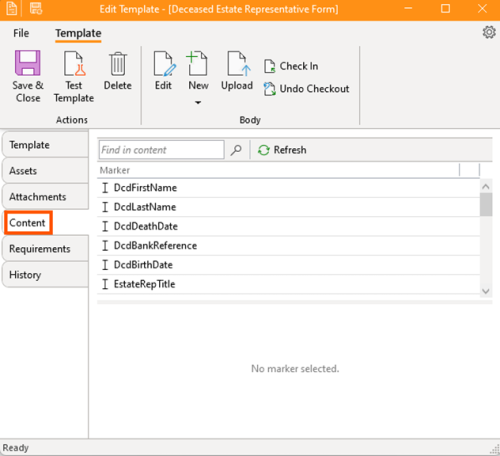
# | # Go back to the contactslaw app, and proceed to “'''Content'''” and click "'''Refresh"''' button. [[File:Step 8 - PDF Template.png|none|thumb|500x500px]] | ||
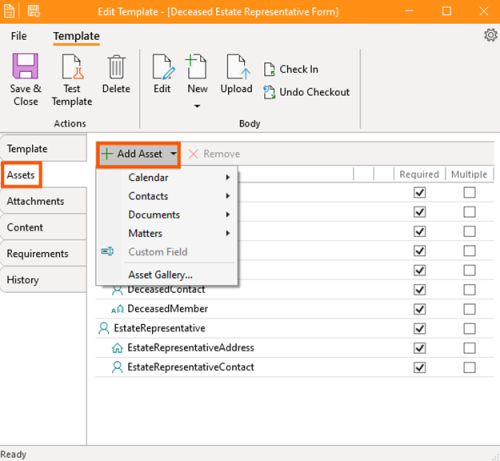
#Next proceed to the “Assets” and add the certain assets that you’re gonna need such as calendars, contacts, documents, or matters. Note: You should check if the assets you’ve added covered the main ones in your content. [[File:Step 9 - PDF Template.png|none|thumb|500x500px]] | |||
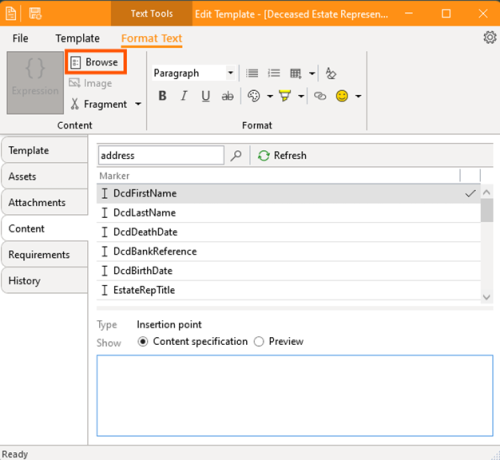
#Now, we're gonna start mapping the content fields in the document to the assets we've just created, and the easiest way to go is to click the “'''Browse'''”.[[File:Step 10 - PDF Template.png|none|thumb|500x500px|[[File:Step 10.1 - PDF Template.png|none|thumb|500x500px]]]] | |||
#You must select the specific asset that matches your contents. [[File:Step 11 - PDF Template.png|none|thumb|500x500px|[[File:Step 11.1 - PDF Template.png|none|thumb|500x500px]]]] | |||
#Once you have done mapping the main assets to your contents, let's just go back to the template then click “'''Save and Close'''”. [[File:Step 12 - PDF Template.png|none|thumb|500x500px]] | |||
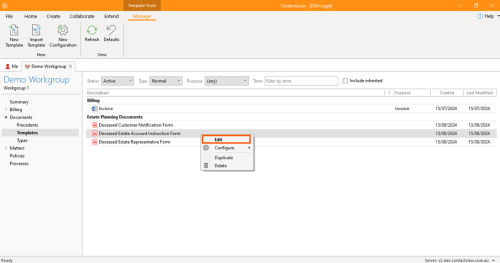
#To check if you mapped your contents in the right assets, just right click the template you have created and choose “'''Edit'''”. [[File:Step 13 - PDF Template.png|none|thumb|500x500px]] | |||
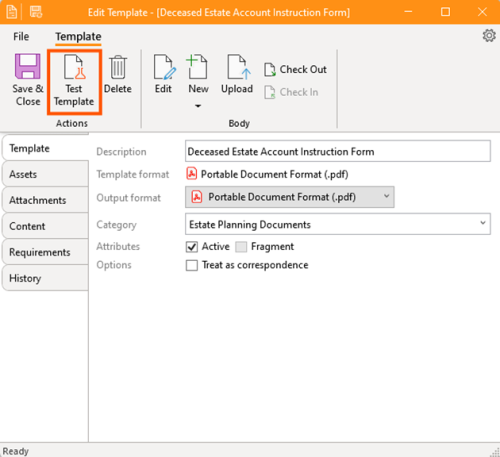
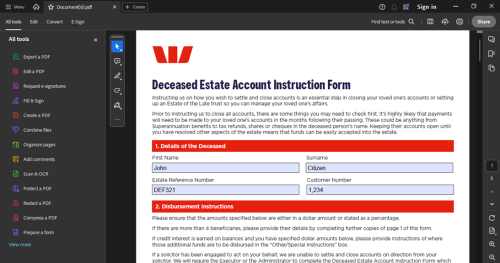
#Then you will go back to the edit template tab and just click the “'''Test Template'''”.[[File:Step 14 - PDF Template.png|none|thumb|500x500px|[[File:Step 14.1 - PDF Template.png|none|thumb|500x500px]]]] | |||
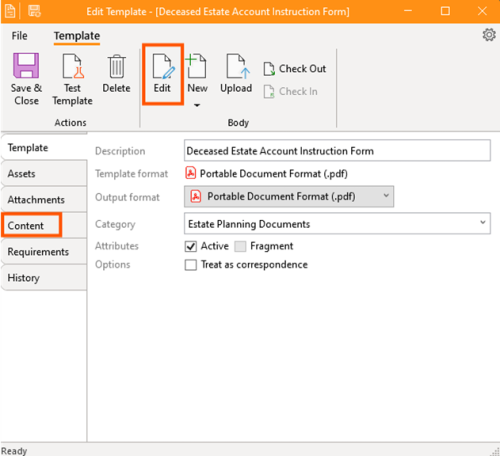
#In case you notice that there are fields that don't have any details, just go back to the ContactsLaw edit template tab and click edit or go to contents to change some mappings to the assets. [[File:Step 15 - PDF Template.png|none|thumb|500x500px]] | |||
Revision as of 09:32, 16 August 2024
- The starting point of creating templates is you must have a workgroup or you may select an existing workgroup in the application.
- Then you may proceed to the “Documents” section and choose “Templates”. Then click, “New Template”.
- Since you are creating a PDF template, just click the “Upload” and choose the PDF file you want to upload.
- After uploading the PDF, change the description and the category of the template you are creating.
- Now let’s proceed to “Edit” to prepare what details are needed from the third party which this process is called, “Setting up PDF Template”.
- In order to edit the fields in the template, we recommend using Adobe Acrobat. Once you've made your desired changes, you will be redirected to the Adobe Acrobat interface where you can fully change or edit the fields that need to be filled in by the third party.
- Once the desired fields for third-party input have been finalized, simply click "Save".
- Go back to the contactslaw app, and proceed to “Content” and click "Refresh" button.
- Next proceed to the “Assets” and add the certain assets that you’re gonna need such as calendars, contacts, documents, or matters. Note: You should check if the assets you’ve added covered the main ones in your content.
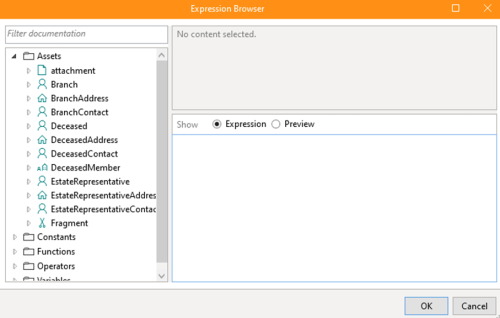
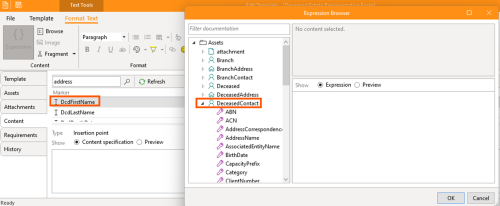
- Now, we're gonna start mapping the content fields in the document to the assets we've just created, and the easiest way to go is to click the “Browse”.
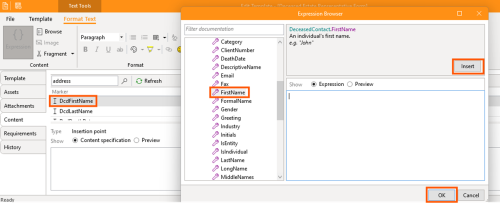
- You must select the specific asset that matches your contents.
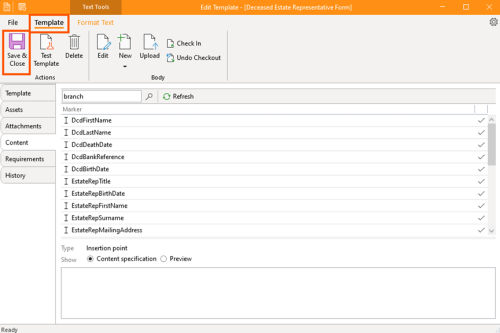
- Once you have done mapping the main assets to your contents, let's just go back to the template then click “Save and Close”.
- To check if you mapped your contents in the right assets, just right click the template you have created and choose “Edit”.
- Then you will go back to the edit template tab and just click the “Test Template”.
- In case you notice that there are fields that don't have any details, just go back to the ContactsLaw edit template tab and click edit or go to contents to change some mappings to the assets.


