How-To:Recovery: Difference between revisions

From ContactsLaw Documentation
mNo edit summary
No edit summary
Line 1: Line 1:
== How to view “Recovery” ==
== 1. Getting Started ==


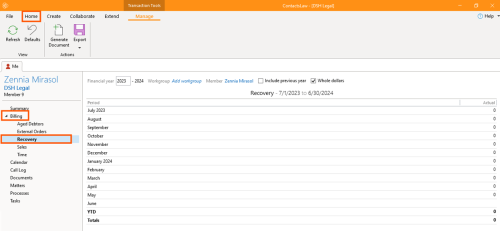
# Open the app and go to the ''''Billing'''<nowiki/>' section. Click the arrow, then select "'''Recovery'''".[[File:Step 1 - Recovery.png|none|thumb|500x500px]]
# Under ''Me'' tab, select ''Billing'' from t<nowiki/>he navigation pane and choose the ''Recovery'' view.[[File:Step 1 - Recovery.png|none|thumb|500x500px]]
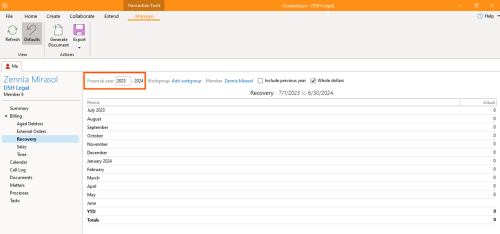
# Input the '''financial year''' you want to see.[[File:Step 2 - Recovery.png|none|thumb|500x500px]]
 
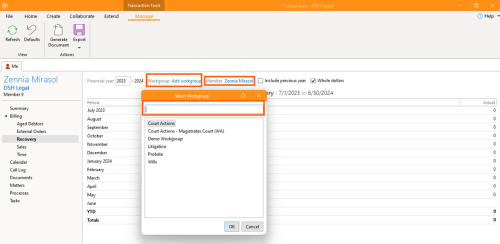
# Add a '''workgroup''' and a '''member'''.[[File:Step 3 - Recovery.png|none|thumb|500x500px]]
== 2. Input Details ==
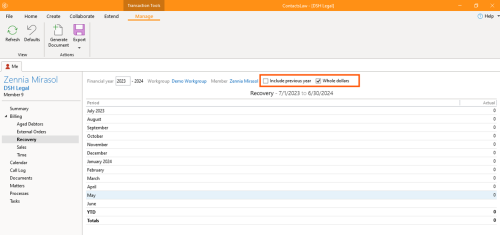
# Click the box to include the '''previous year''' or view in '''whole dollars'''.[[File:Step 4 - Recovery.png|none|thumb|500x500px]]
# Input the ''financial year'' you want to see.[[File:Step 2 - Recovery.png|none|thumb|500x500px]]
# Add a ''workgroup'' and a ''member''.[[File:Step 3 - Recovery.png|none|thumb|500x500px]]
# Click the box to include the ''previous year'' or view in ''whole dollars''.[[File:Step 4 - Recovery.png|none|thumb|500x500px]]
[[Category:How-To]]
[[Category:How-To]]

Revision as of 12:18, 5 September 2024

1. Getting Started

  1. Under Me tab, select Billing from the navigation pane and choose the Recovery view.
    Step 1 - Recovery.png

2. Input Details

  1. Input the financial year you want to see.
    Step 2 - Recovery.png
  2. Add a workgroup and a member.
    Step 3 - Recovery.png
  3. Click the box to include the previous year or view in whole dollars.
    Step 4 - Recovery.png