How-To:InfoTrack Integration: Difference between revisions
No edit summary |
No edit summary |
||
| Line 41: | Line 41: | ||
== 2. Specify Options == | == 2. Specify Options == | ||
In the order external service window, there are options that you need to fill up. | In the order external service window, there are options that you need to fill up. | ||
[[File:Step 9 - InfoTrack (From Video).png|none|thumb]] | |||
* '''Matter''': A [[matter]] is the primary unit of work in ContactsLaw. It groups together all of the documents, invoices and tasks pertaining to a particular legal service, consultation, prospect or administrative topic. | * '''Matter''': A [[matter]] is the primary unit of work in ContactsLaw. It groups together all of the documents, invoices and tasks pertaining to a particular legal service, consultation, prospect or administrative topic. | ||
| Line 47: | Line 47: | ||
* '''Service''': This option has various choices such as PEXA Workspace, Landgate Search, ASIC Search, PPSR Search, Web VIO, and Bankruptcy Search. By clicking one of these services, it will just shortcut and take you to that particular service. | * '''Service''': This option has various choices such as PEXA Workspace, Landgate Search, ASIC Search, PPSR Search, Web VIO, and Bankruptcy Search. By clicking one of these services, it will just shortcut and take you to that particular service. | ||
[[File:Step 10 - InfoTrack (From Video).png|none|thumb]] | |||
* '''Contact''': This option must be filled with a [[Contact]]. | * '''Contact''': This option must be filled with a [[Contact]]. | ||
* '''Document''': This option is to add documents related to this transaction. | * '''Document''': This option is to add documents related to this transaction. | ||
| Line 54: | Line 54: | ||
* After filling the details in the order external service window, you will be directed on the ''InfoTrack Website''. | * After filling the details in the order external service window, you will be directed on the ''InfoTrack Website''. | ||
* Click ''Ok'', and another window will show on the screen, asking for the sign in details to the ''InfoTrack Website''. | [[File:Step 11 - InfoTrack (From Video).png|none|thumb]] | ||
* The next step will be on the ''InfoTrack Website'' and you will be directed to the ''ASIC Search''. | * Click ''Ok'', and another window will show on the screen, asking for the sign in details to the ''InfoTrack Website''. | ||
[[File:Step 12 - InfoTrack (From Video).png|none|thumb]] | |||
* The next step will be on the ''InfoTrack Website'' and you will be directed to the ''ASIC Search''. | |||
[[File:Step 13 - InfoTrack (From Video).png|none|thumb]] | |||
* If you choose ''Option 1'' in the ''Getting Started'', the information will be pre-filled in the ''ASIC Search''. Then click ''Lookup''. | * If you choose ''Option 1'' in the ''Getting Started'', the information will be pre-filled in the ''ASIC Search''. Then click ''Lookup''. | ||
[[File:Step 14 - InfoTrack (From Video).png|none|thumb]] | |||
* A window showing the current transactions will appear on the screen. Then, proceed to select the order that you created by checking the checkbox and click ''confirm''. | * A window showing the current transactions will appear on the screen. Then, proceed to select the order that you created by checking the checkbox and click ''confirm''. | ||
* Now as you can see the transaction you created has a price. Just review the details of your order and click on ''Place Order''. | [[File:Step 16 - InfoTrack (From Video).png|none|thumb]] | ||
* In terms of the service delivery fee, an email will be sent to you in a PDF File. | * Now as you can see the transaction you created has a price. Just review the details of your order and click on ''Place Order''. | ||
[[File:Step 17 - InfoTrack (From Video).png|none|thumb]] | |||
* In terms of the service delivery fee, an email will be sent to you in a PDF File. | |||
* After placing the order, the ''InfoTrack'' would also send the information about pricing and the order will reflect in the ''External Order'' Ledger in the ContactsLaw. | * After placing the order, the ''InfoTrack'' would also send the information about pricing and the order will reflect in the ''External Order'' Ledger in the ContactsLaw. | ||
[[File:Step 18 - InfoTrack.png|none|thumb]] | |||
== 4. External Services Configuration == | == 4. External Services Configuration == | ||
* Navigate to the ribbon group. Proceed to My Business, click on ''Billing'' and choose ''External Order Types''. | * Navigate to the ribbon group. Proceed to My Business, click on ''Billing'' and choose ''External Order Types''. | ||
[[File:Step 19 - InfoTrack.png|none|thumb]] | |||
== 5. Specify Options == | == 5. Specify Options == | ||
In the New External Order Type window, there are options that you need to fill up. | In the New External Order Type window, there are options that you need to fill up. | ||
[[File:Step 20 - InfoTrack.png|none|thumb]] | |||
* '''Provider''': As of the moment this option has only one choice which is the ''InfoTrack''. | * '''Provider''': As of the moment this option has only one choice which is the ''InfoTrack''. | ||
| Line 73: | Line 82: | ||
* '''Order Profiles''': This basically allows us to differentiate between different types of services and how we want the system to behave in response to those. | * '''Order Profiles''': This basically allows us to differentiate between different types of services and how we want the system to behave in response to those. | ||
[[File:Step 21 - InfoTrack (Order Profiles).png|none|thumb]] | |||
* '''Billing Type& Services''': These options are determined by Infotrack. | * '''Billing Type& Services''': These options are determined by Infotrack. | ||
* '''Disbursement Type''': This option must be filled with either ''InfoTrack order'' or ''Title Searc''h. | * '''Disbursement Type''': This option must be filled with either ''InfoTrack order'' or ''Title Searc''h. | ||
* '''Document Type''': [[Document Type|Document types]] serve as a method of categorising documents in ContactsLaw. | * '''Document Type''': [[Document Type|Document types]] serve as a method of categorising documents in ContactsLaw. | ||
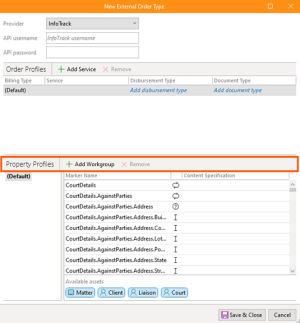
* '''Property Profiles''': This basically allows us to determine the whole series of properties that the info track cares about. | * '''Property Profiles''': This basically allows us to determine the whole series of properties that the info track cares about. | ||
[[File:Step 22 - InfoTrack (Property Profiles).png|none|thumb]] | |||
* '''Marker Name''': This option will identify what type of service you will order. These services are connected to InfoTrack. | * '''Marker Name''': This option will identify what type of service you will order. These services are connected to InfoTrack. | ||
* '''Content Specification''': This is a specification in which you will be getting the information such as Matter or Matter.folio. | |||
Revision as of 20:20, 18 November 2024
Beginning
This section of ContactsLaw provides an overview about the InfoTrack Integration.The ContactsLaw has an integration with an Australian company called Infotrack which they basically allow lawyers and law firms to order external services such as company searches, title searches that allows them to pre-fill things for doing verification of identity.
The below guide will be covering the end user experience about InfoTrack Integration:
1. Getting Started
There are multiple ways to open the activity for External Services in the ContactsLaw.
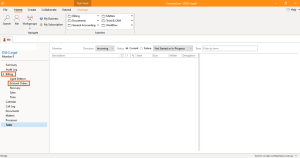
- Option 1: Navigate ribbon group and proceed to Billing.
- Dropdown the billing and click on Order External Service.
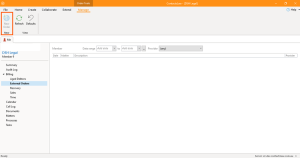
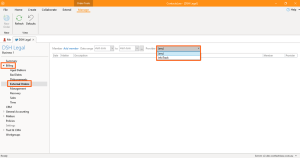
- Option 2: Go to Me tab and proceed to Billing and click on External Orders.
- Navigate to the ribbon group and click New Order.
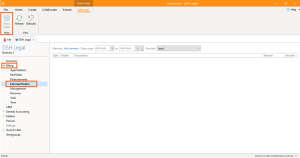
- Option 3: Proceed to my My Business, click on Billing Section.
- Click on External Orders and choose New Order in the ribbon group.
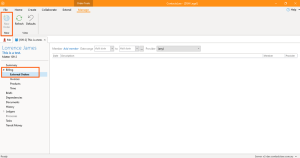
- Option 4: Navigate to the ribbon group and proceed to Search a Matter.
- Select a matter and proceed Billing and click on External Orders. After clicking the External Orders, proceed to navigate the ribbon group and choose New Order.
2. Specify Options
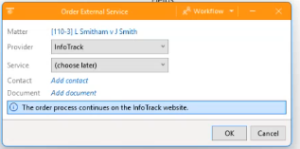
In the order external service window, there are options that you need to fill up.
- Matter: A matter is the primary unit of work in ContactsLaw. It groups together all of the documents, invoices and tasks pertaining to a particular legal service, consultation, prospect or administrative topic.
- Provider: As of the moment this option has only one choice which is the InfoTrack.
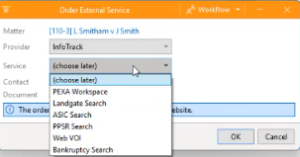
- Service: This option has various choices such as PEXA Workspace, Landgate Search, ASIC Search, PPSR Search, Web VIO, and Bankruptcy Search. By clicking one of these services, it will just shortcut and take you to that particular service.
- Contact: This option must be filled with a Contact.
- Document: This option is to add documents related to this transaction.
3. InfoTrack Website
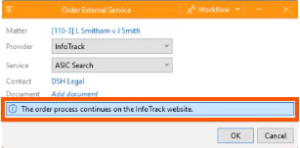
- After filling the details in the order external service window, you will be directed on the InfoTrack Website.
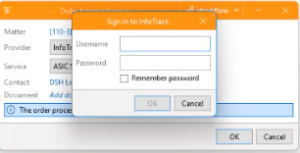
- Click Ok, and another window will show on the screen, asking for the sign in details to the InfoTrack Website.
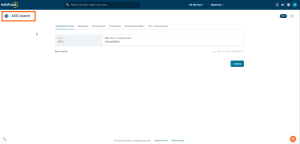
- The next step will be on the InfoTrack Website and you will be directed to the ASIC Search.
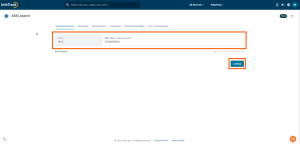
- If you choose Option 1 in the Getting Started, the information will be pre-filled in the ASIC Search. Then click Lookup.
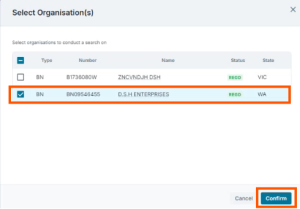
- A window showing the current transactions will appear on the screen. Then, proceed to select the order that you created by checking the checkbox and click confirm.
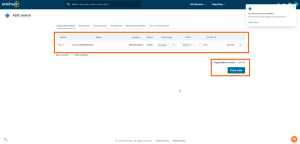
- Now as you can see the transaction you created has a price. Just review the details of your order and click on Place Order.
- In terms of the service delivery fee, an email will be sent to you in a PDF File.
- After placing the order, the InfoTrack would also send the information about pricing and the order will reflect in the External Order Ledger in the ContactsLaw.
4. External Services Configuration
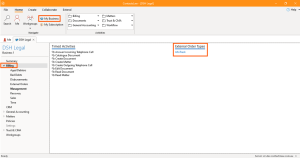
- Navigate to the ribbon group. Proceed to My Business, click on Billing and choose External Order Types.
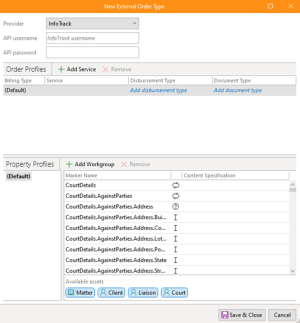
5. Specify Options
In the New External Order Type window, there are options that you need to fill up.
- Provider: As of the moment this option has only one choice which is the InfoTrack.
- AP username & AP password: This option will identify the subscribers and members of the ContactsLaw.
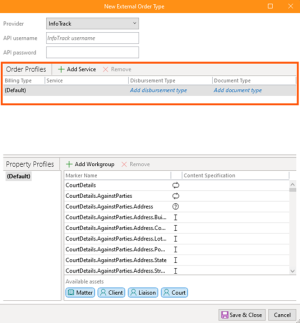
- Order Profiles: This basically allows us to differentiate between different types of services and how we want the system to behave in response to those.
- Billing Type& Services: These options are determined by Infotrack.
- Disbursement Type: This option must be filled with either InfoTrack order or Title Search.
- Document Type: Document types serve as a method of categorising documents in ContactsLaw.
- Property Profiles: This basically allows us to determine the whole series of properties that the info track cares about.
- Marker Name: This option will identify what type of service you will order. These services are connected to InfoTrack.
- Content Specification: This is a specification in which you will be getting the information such as Matter or Matter.folio.


