How-To:Reconciliation: Difference between revisions
(Created page with "Let's walk through the process of performing reconciliations in ContactsLaw. This guide will help you ensure that your recorded transactions match your bank statement, allowing for accurate financial management. ==== 1. Create a New Reconciliation ==== # '''Access Reconciliation''': Start by going to the "Reconciliation" section in ContactsLaw and click on "New Reconciliation" from the ribbon. This will open a provisional view where you'll begin the process. # '''Selec...") |
No edit summary |
||
| (5 intermediate revisions by 3 users not shown) | |||
| Line 1: | Line 1: | ||
{{DISPLAYTITLE:How to Reconcile Accounts}} | |||
This guide will help you ensure that your recorded transactions match your bank statement, allowing for accurate financial management. | |||
== 1. Create a New Reconciliation == | |||
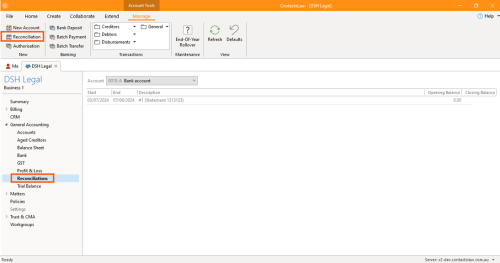
* Start by going to the "''Reconciliation''" section in ContactsLaw and click on ''"New Reconciliation''" from the ribbon. This will open a provisional view where you will begin the process.[[File:Step 1 - Reconciliation.png|none|thumb|500x500px]] | |||
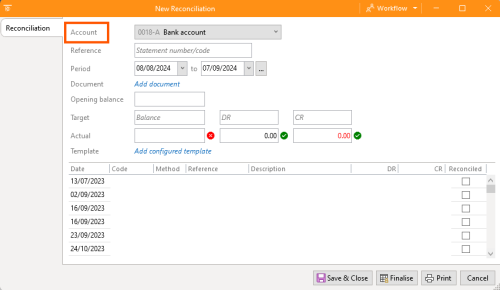
* Choose the account you want to reconcile. ContactsLaw will display a list of accounts that have been marked as reconcilable. Typically, this includes bank and credit card accounts, but any account can be marked as reconcilable in the account properties.[[File:Step 2 - Reconciliation.png|none|thumb|500x500px]] | |||
== 2. Enter Bank Statement Details == | |||
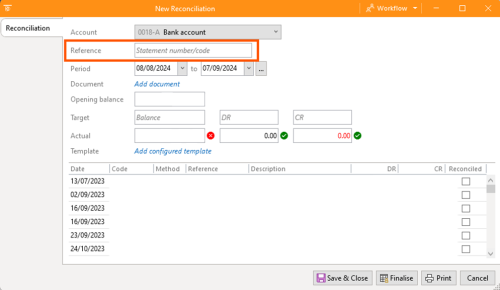
* Enter the statement number or reference from your bank statement. This is primarily for your own records and helps you keep track of the reconciliation.[[File:Step 3 - Reconciliation.png|none|thumb|500x500px]] | |||
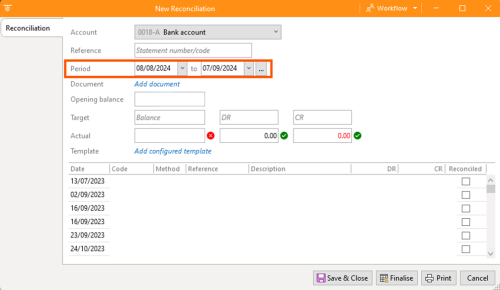
* Define the period you are reconciling. The system defaults to the current month, ending on the day prior to today. Adjust the dates as necessary to match the period covered by your bank statement.[[File:Step 4 - Reconciliation.png|none|thumb|500x500px]] | |||
==== | == 3. Review Transactions == | ||
* The system will display all transactions that occurred within the selected period and are in a processed state. | |||
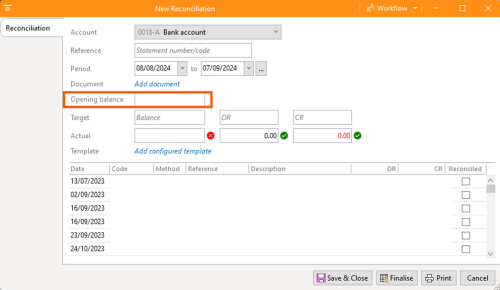
* Verify the opening balance shown in the system. Since this is the first reconciliation, the opening balance will be zero. For subsequent reconciliations, this field will display the closing balance from the previous reconciliation.[[File:Step 5 - Reconciliation.png|none|thumb|500x500px]] | |||
== | == 4. Reconcile Transactions == | ||
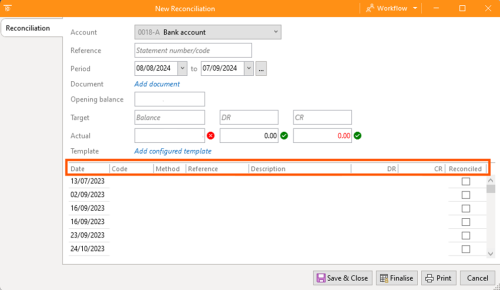
* Compare the transactions listed in ContactsLaw with those on your bank statement. For each transaction that matches, tick it the box to mark it as reconciled. This action will automatically update the actual balance, debit, and credit figures in the system. | |||
* If you encounter any discrepancies, such as unpresented cheques or undeposited funds, make note of these. They will be included in the reconciliation report to explain differences between the bank statement and system records.[[File:Step 6 - Reconciliation.png|none|thumb|500x500px]] | |||
== 5. Finalise the Reconciliation == | |||
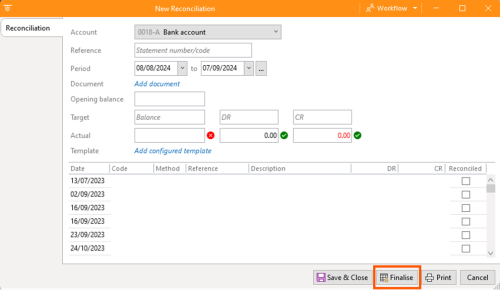
* Once all transactions are matched, finalise the reconciliation. ContactsLaw will generate a reconciliation document, similar to finalising an invoice. This document includes all relevant details, such as unpresented cheques and undeposited funds, and serves as a report for your records. | |||
* If needed, you can reconcile multiple accounts by marking additional accounts as reconcilable in the account properties.[[File:Step 7 - Reconciliation.png|none|thumb|500x500px]] | |||
[[Category:How-To]] | |||
Latest revision as of 23:22, 2 December 2024
This guide will help you ensure that your recorded transactions match your bank statement, allowing for accurate financial management.
1. Create a New Reconciliation
- Start by going to the "Reconciliation" section in ContactsLaw and click on "New Reconciliation" from the ribbon. This will open a provisional view where you will begin the process.
- Choose the account you want to reconcile. ContactsLaw will display a list of accounts that have been marked as reconcilable. Typically, this includes bank and credit card accounts, but any account can be marked as reconcilable in the account properties.
2. Enter Bank Statement Details
- Enter the statement number or reference from your bank statement. This is primarily for your own records and helps you keep track of the reconciliation.
- Define the period you are reconciling. The system defaults to the current month, ending on the day prior to today. Adjust the dates as necessary to match the period covered by your bank statement.
3. Review Transactions
- The system will display all transactions that occurred within the selected period and are in a processed state.
- Verify the opening balance shown in the system. Since this is the first reconciliation, the opening balance will be zero. For subsequent reconciliations, this field will display the closing balance from the previous reconciliation.
4. Reconcile Transactions
- Compare the transactions listed in ContactsLaw with those on your bank statement. For each transaction that matches, tick it the box to mark it as reconciled. This action will automatically update the actual balance, debit, and credit figures in the system.
- If you encounter any discrepancies, such as unpresented cheques or undeposited funds, make note of these. They will be included in the reconciliation report to explain differences between the bank statement and system records.
5. Finalise the Reconciliation
- Once all transactions are matched, finalise the reconciliation. ContactsLaw will generate a reconciliation document, similar to finalising an invoice. This document includes all relevant details, such as unpresented cheques and undeposited funds, and serves as a report for your records.
- If needed, you can reconcile multiple accounts by marking additional accounts as reconcilable in the account properties.


