How-To:PDF Template: Difference between revisions
No edit summary |
No edit summary |
||
| (9 intermediate revisions by 4 users not shown) | |||
| Line 1: | Line 1: | ||
{{DISPLAYTITLE:How to Create PDF Templates}} | |||
[[ContactsLaw]] offers a robust, user-friendly system for document creation that leverages advanced templating functions to enhance efficiency and accuracy in legal document generation. Through this system, users can design and configure custom templates to minimise repetitive data entry, streamline document production, and maintain consistency across files.. | |||
To begin using the system, consult the [[How-To:Document Template|Create Template]] guide for a complete introduction to template creation. | |||
== 1. Getting Started == | |||
* Open the New Template window (see the [[How-To:Document Template|Create Template]] guide for details). | |||
* Click “''Upload''” and choose the PDF file that will serve as your template.[[File:Step 3 - PDF Template.png|none|thumb|500x500px]] | |||
== 2. Specify Options == | |||
* After uploading, input a descriptive name for the template. If you want to categorise it, add or select an appropriate category name.[[File:Step 4 - PDF Template.png|none|thumb|500x500px]] | |||
* Go to the ''Content'' menu and click "Refresh." Note that if your PDF originates from a third-party source with existing fields, you may see irrelevant field names. This occurs when third-party fields lack specific identifiers, making it crucial to rename them appropriately for optimal functionality.[[File:Step 8 - PDF Template.png|none|thumb|500x500px]] | |||
* To have the best templating experience you need to give the fields within the PDF template meaningful names. Start by clicking ''Edit'' to open the PDF file.[[File:Step 5 - PDF Template.png|none|thumb|500x500px]] | |||
== 3. Prepare PDF Form Content == | |||
* We recommend using '''Adobe Acrobat''' for editing. In Adobe Acrobat, access the "''Prepare a Form''" tool to add or modify fields, assigning each field a clear, descriptive name that will appear in ContactsLaw's template editor. This step ensures that fields are easily identifiable and functionally mapped within the template. | |||
[[File:Step 6.1 - PDF Template.png|none|thumb|500x500px|[[File:Step 6.2 - PDF Template.png|none|thumb|500x500px]]]] | |||
* Once field naming is complete, save the PDF and return to ContactsLaw, selecting "''Check In''" in the '''Edit Template''' window. In the '''Content''' window, click "Refresh" to display the newly added fields. [[File:Step 7 - PDF Template.png|none|thumb|500x500px]] | |||
* Click the "'''Refresh"''' button in the "Content" window. Your newly generated/named fields will then appear.[[File:PDF Template - Refresh.png|none|thumb|500x500px]] | |||
== 4. Specify Assets == | |||
* Navigate to the '''Assets''' section and add any data sources, or “assets,” needed to populate the template’s content fields. Use the “Browse” option to select assets and attributes relevant to each field.[[File:Step 9 - PDF Template.png|none|thumb|500x500px]] | |||
*Proceed to map the content fields in the document (referring to the Assets selected). The easiest way to do this is to click the “'''Browse'''” which will then give you the list of assets and different attributes that can be drawn on.[[File:Step 10 - PDF Template.png|none|thumb|500x500px|[[File:Step 10.1 - PDF Template.png|none|thumb|500x500px]]]] | |||
*For each content field, link an asset and specify any required formatting. Refer to the [[Document Template]] guide for further details on content field options and formatting capabilities [[File:Step 11 - PDF Template.png|none|thumb|500x500px|[[File:Step 11.1 - PDF Template.png|none|thumb|500x500px]]]] | |||
== 5. Final Steps == | |||
* Test your template by selecting "Test Template." This feature uses generic data to populate the fields, allowing you to preview the document and verify accuracy.[[File:Step 14 - PDF Template.png|none|thumb|500x500px]] | |||
*Should any issues arise, you can make adjustments within the '''Content''' menu to refine field mappings and settings. | |||
*Lastly, the template must undergo [[Template Configuration|configuration]] to finalise it for use. [[File:Step 15 - PDF Template.png|none|thumb|500x500px]]This structured approach to creating templates within ContactsLaw ensures that each document is tailored to meet specific requirements, reducing errors and enhancing productivity in legal documentation. | |||
[[Category:How-To]] | |||
Latest revision as of 14:59, 3 December 2024
ContactsLaw offers a robust, user-friendly system for document creation that leverages advanced templating functions to enhance efficiency and accuracy in legal document generation. Through this system, users can design and configure custom templates to minimise repetitive data entry, streamline document production, and maintain consistency across files..
To begin using the system, consult the Create Template guide for a complete introduction to template creation.
1. Getting Started
- Open the New Template window (see the Create Template guide for details).
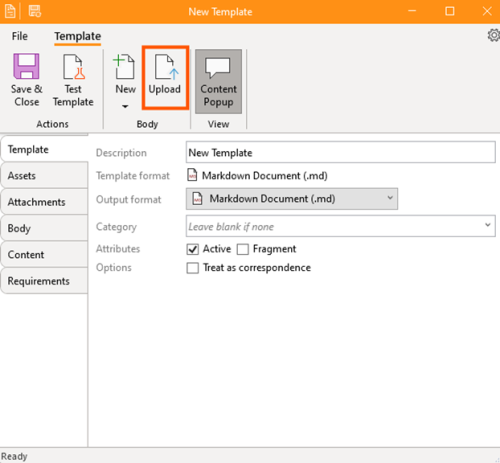
- Click “Upload” and choose the PDF file that will serve as your template.
2. Specify Options
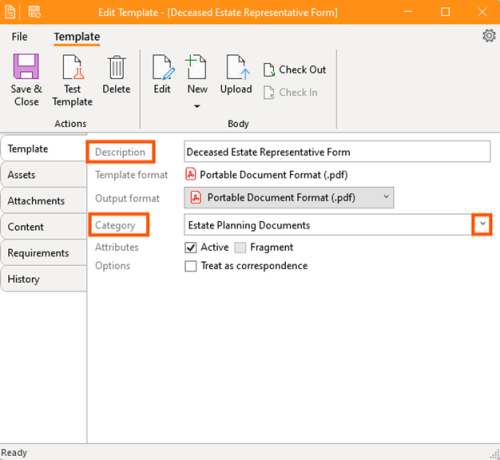
- After uploading, input a descriptive name for the template. If you want to categorise it, add or select an appropriate category name.
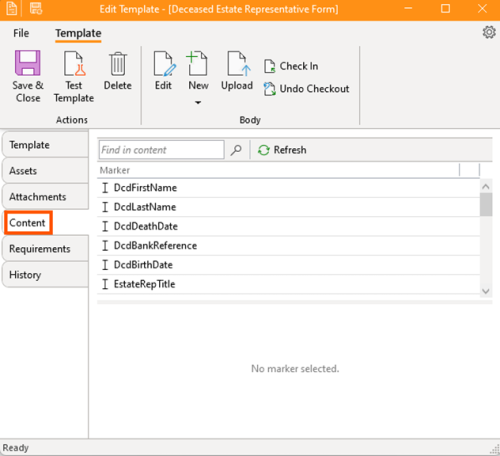
- Go to the Content menu and click "Refresh." Note that if your PDF originates from a third-party source with existing fields, you may see irrelevant field names. This occurs when third-party fields lack specific identifiers, making it crucial to rename them appropriately for optimal functionality.
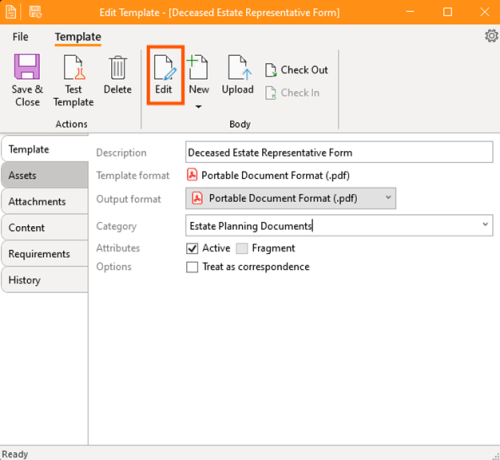
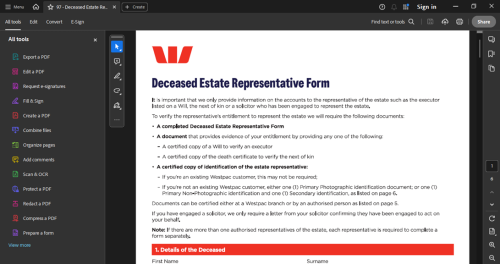
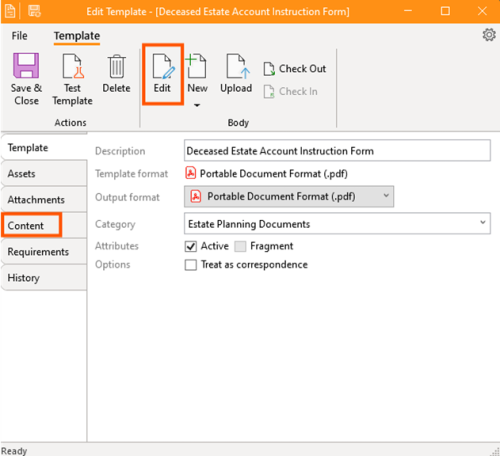
- To have the best templating experience you need to give the fields within the PDF template meaningful names. Start by clicking Edit to open the PDF file.
3. Prepare PDF Form Content
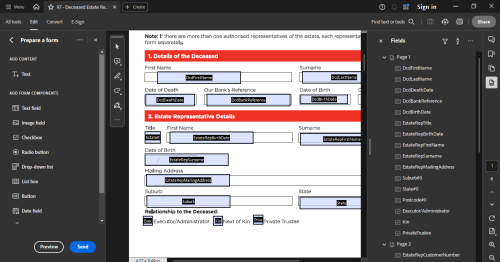
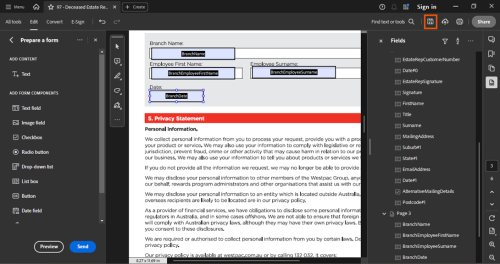
- We recommend using Adobe Acrobat for editing. In Adobe Acrobat, access the "Prepare a Form" tool to add or modify fields, assigning each field a clear, descriptive name that will appear in ContactsLaw's template editor. This step ensures that fields are easily identifiable and functionally mapped within the template.
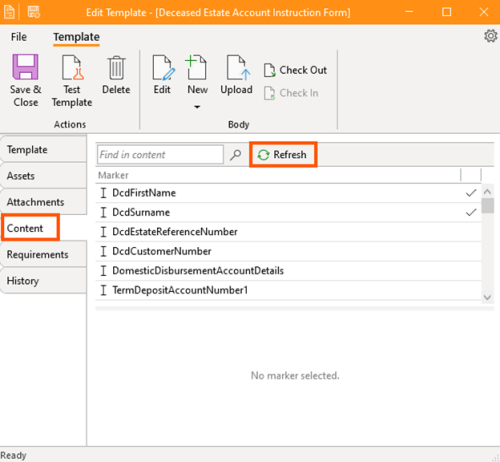
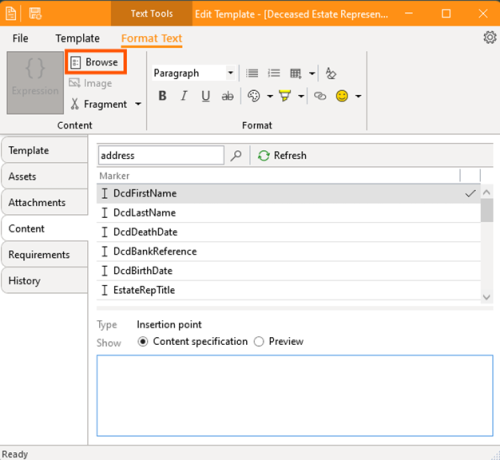
- Once field naming is complete, save the PDF and return to ContactsLaw, selecting "Check In" in the Edit Template window. In the Content window, click "Refresh" to display the newly added fields.
- Click the "Refresh" button in the "Content" window. Your newly generated/named fields will then appear.
4. Specify Assets
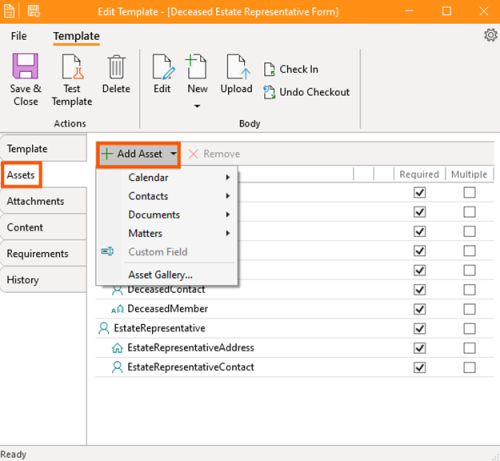
- Navigate to the Assets section and add any data sources, or “assets,” needed to populate the template’s content fields. Use the “Browse” option to select assets and attributes relevant to each field.
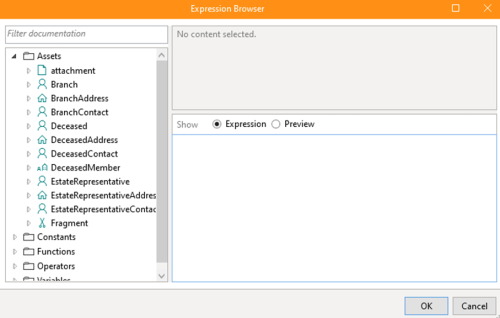
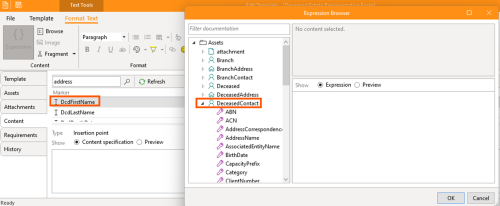
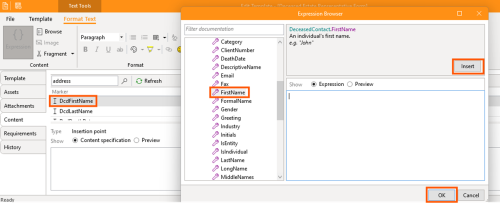
- Proceed to map the content fields in the document (referring to the Assets selected). The easiest way to do this is to click the “Browse” which will then give you the list of assets and different attributes that can be drawn on.
- For each content field, link an asset and specify any required formatting. Refer to the Document Template guide for further details on content field options and formatting capabilities
5. Final Steps
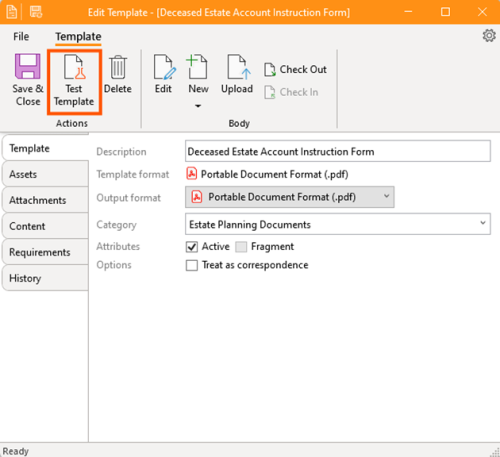
- Test your template by selecting "Test Template." This feature uses generic data to populate the fields, allowing you to preview the document and verify accuracy.
- Should any issues arise, you can make adjustments within the Content menu to refine field mappings and settings.
- Lastly, the template must undergo configuration to finalise it for use. This structured approach to creating templates within ContactsLaw ensures that each document is tailored to meet specific requirements, reducing errors and enhancing productivity in legal documentation.


