How-To:Upload Document: Difference between revisions
(Created page with "== How to “Upload” Document(s). == # Open the app and go to the “Document” section. Click the arrow, then select "Upload Document(s)”.none|thumb|500x500pxnone|thumb|500x500px # Then you have 2 choices, browse a file in your computer or to extract a file. none|thumb|500x500px # The file you’ve chosen will be automatically reflect on the screen...") |
mNo edit summary |
||
| Line 6: | Line 6: | ||
# Then click upload. [[File:Step 4 - Upload Document.png|none|thumb|500x500px]] | # Then click upload. [[File:Step 4 - Upload Document.png|none|thumb|500x500px]] | ||
# If you want to check the document that you created, just go to the left side of your screen and click the “Documents - All Documents”.[[File:Step 5 - Upload Document.png|none|thumb|500x500px]] | # If you want to check the document that you created, just go to the left side of your screen and click the “Documents - All Documents”.[[File:Step 5 - Upload Document.png|none|thumb|500x500px]] | ||
[[Category:How-To]] | |||
Revision as of 11:21, 10 June 2024
How to “Upload” Document(s).
- Open the app and go to the “Document” section. Click the arrow, then select "Upload Document(s)”.
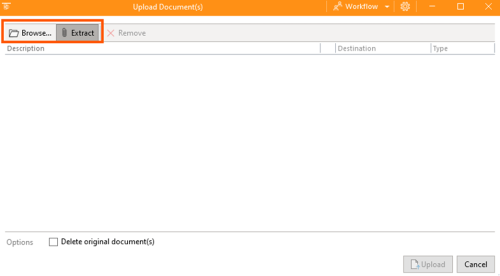
- Then you have 2 choices, browse a file in your computer or to extract a file.
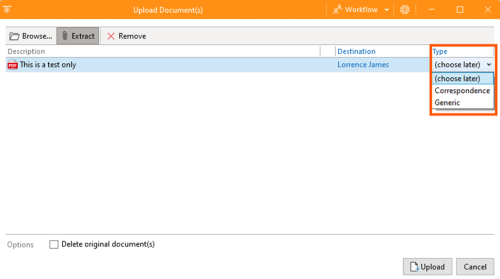
- The file you’ve chosen will be automatically reflect on the screen and you will chose what type this file is, it can be “Correspondence”, “Generic” or “choose later”.
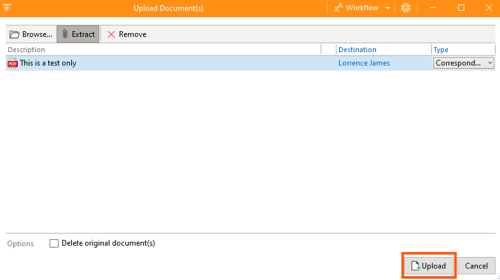
- Then click upload.
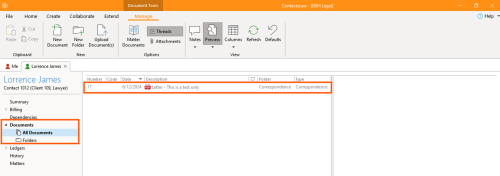
- If you want to check the document that you created, just go to the left side of your screen and click the “Documents - All Documents”.


