How-To:Create Document: Difference between revisions
(Created page with " == How to “Create” Document == # Open the app and go to the “Document” section. Click the arrow, then select "Create Document”.none|thumb|500x500pxnone|thumb|500x500px # You will be directed to the “New Document” and fill up the necessary details. none|thumb|500x500px # Add a workgroup.File:Step 3 - Create Document.png|none|thumb|566x5...") |
mNo edit summary |
||
| Line 9: | Line 9: | ||
# The click, Finish.[[File:Step 5.1 - Create Document.png|none|thumb|500x500px]] | # The click, Finish.[[File:Step 5.1 - Create Document.png|none|thumb|500x500px]] | ||
# If you want to check the document that you created, just go to the left side of your screen and click the “Documents - All Documents”.[[File:Step 6 - Create Document.png|none|thumb|500x500px]] | # If you want to check the document that you created, just go to the left side of your screen and click the “Documents - All Documents”.[[File:Step 6 - Create Document.png|none|thumb|500x500px]] | ||
[[Category:How-To]] | |||
Revision as of 11:23, 10 June 2024
How to “Create” Document
- Open the app and go to the “Document” section. Click the arrow, then select "Create Document”.
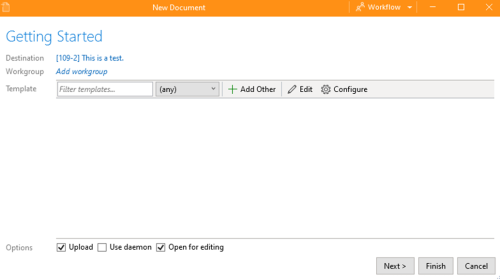
- You will be directed to the “New Document” and fill up the necessary details.
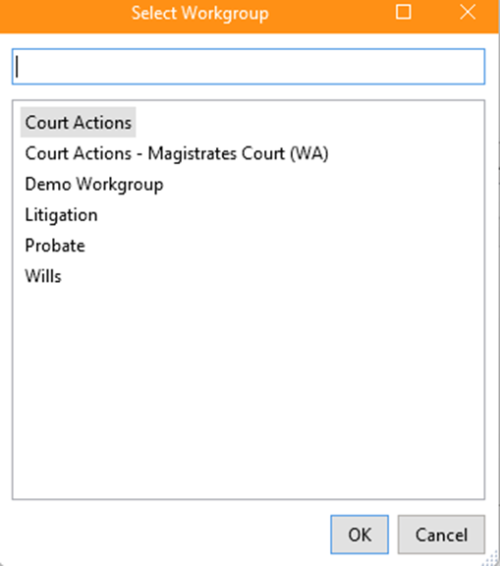
- Add a workgroup.
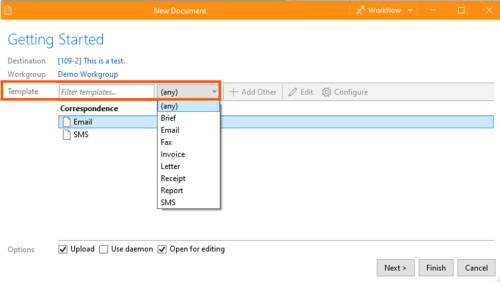
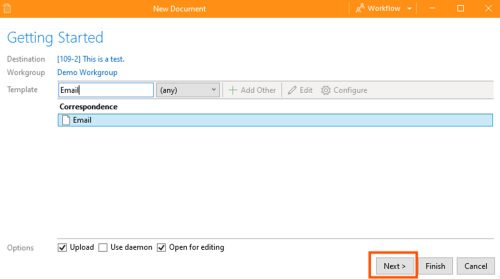
- Select a template. It can be “Email”, “SMS”, “Invoice”, and etc. Then click, next.
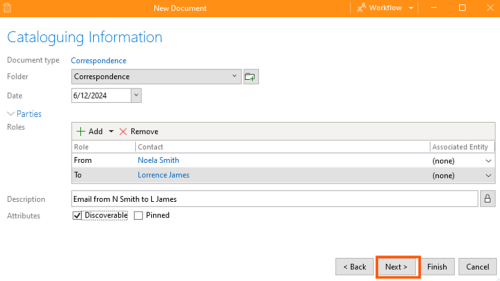
- Review the information and details. Then click next.
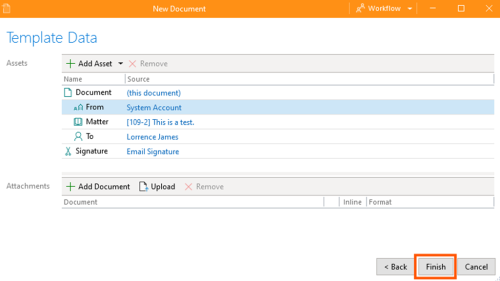
- The click, Finish.
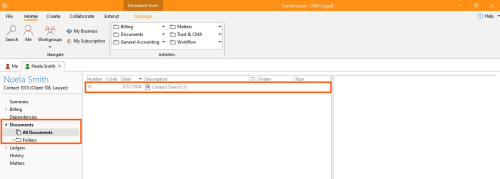
- If you want to check the document that you created, just go to the left side of your screen and click the “Documents - All Documents”.


