How-To:Establish Contact Relationships: Difference between revisions
(Created page with "1. Open the App and click the "'''Search'''" icon none|thumb|500x500px 2. You may search for an existing contact or create a new one. none|thumb|500x500px 3. Then, if you want to establish a relationship between the contact and another contact, the most common action is to jump into the '''related contacts editor.''' none|thumb|500x500px 4....") |
No edit summary |
||
| Line 1: | Line 1: | ||
{{DISPLAYTITLE:How to Establish Contact Relationships}} | |||
1. Open the App and click the "'''Search'''" icon | 1. Open the App and click the "'''Search'''" icon | ||
[[File:Step 1 - Contact Relationship.png|none|thumb|500x500px]] | [[File:Step 1 - Contact Relationship.png|none|thumb|500x500px]] | ||
| Line 41: | Line 42: | ||
- Deletes the contact from the system or displays a list of reasons why the contact cannot be removed. | - Deletes the contact from the system or displays a list of reasons why the contact cannot be removed. | ||
[[Category:How-To]] | |||
Latest revision as of 23:25, 2 December 2024
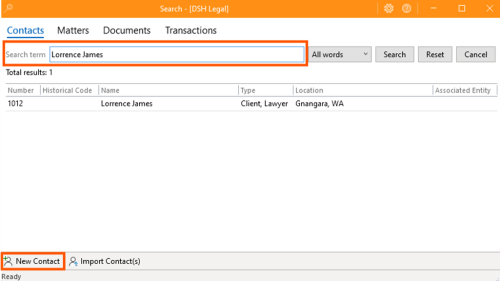
1. Open the App and click the "Search" icon
2. You may search for an existing contact or create a new one.
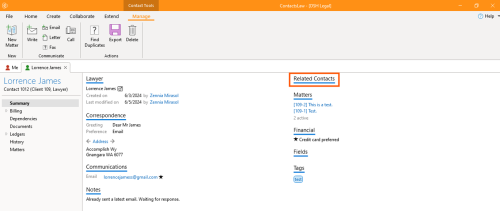
3. Then, if you want to establish a relationship between the contact and another contact, the most common action is to jump into the related contacts editor.
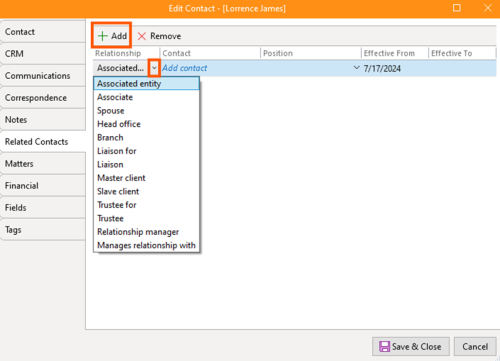
4. Click “Add” and select a relationship from the dropdown menu. These added entities are where someone is working or connected to a business or other entity. They likely hold a position within that entity, which you can specify.
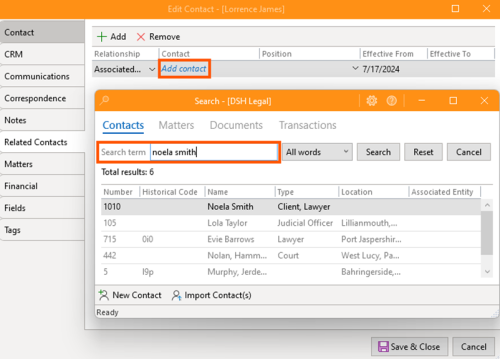
5. Next, add a contact, which will direct you to the contact search bar. Again, you may search for an existing contact or create a new one.
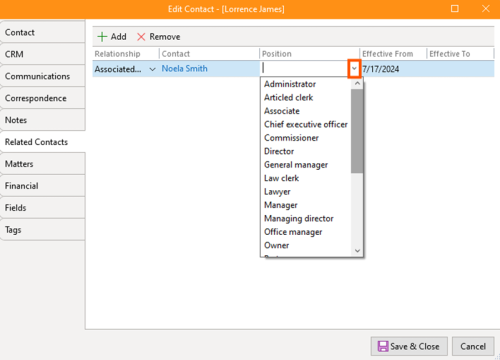
6. For the position, click the dropdown and you may pick from some predefined positions if you want, or you can type your own. The position is simply the role they have within the entity.
7. Set the Relationship Duration
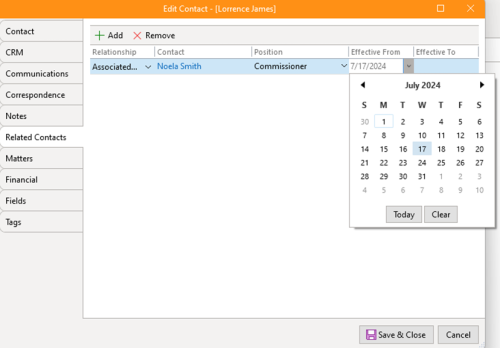
- Relationships can be time-bound. So by default, relationships start from today's date. You can backdate them or set them to always be in effect.
8. Save and Close
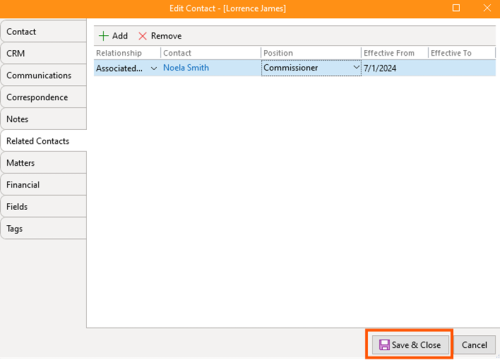
- If you have filled in all necessary details, click “Save and Close”. To add more contacts, repeat the process.
Additional Functions
- Export
- Provides a mechanism for exporting contact information to another application or system.
- Delete
- Deletes the contact from the system or displays a list of reasons why the contact cannot be removed.


