How-To:Document Template
ContactsLaw provides a comprehensive document creation system. It's templating functions allow the creation and sharing of powerful templates to reduce data entry and to simplfy document creation. Users can build and configure their own templates within the system.
The below guide will explain the key steps in creating a template.
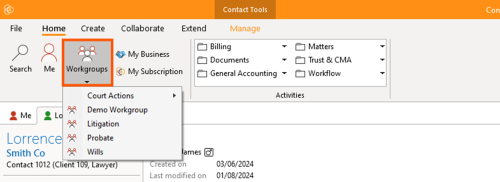
- To open the template creation window, start by selecting the relevant workgroup.
- The template creation window can then be opened, either by:
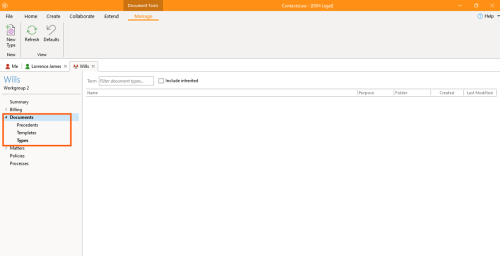
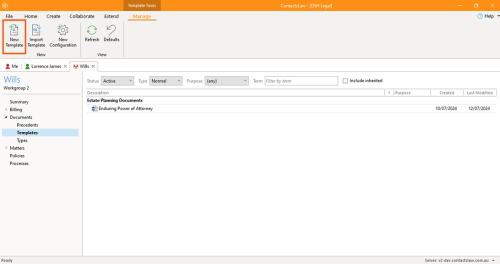
- Option 1: Select “Documents” on the vertical menu and choose “Templates”. Then click, “New Template”.
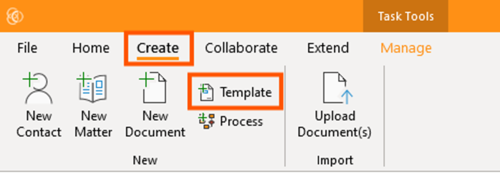
- Option 2: navigate to the “Create” section in the upper part of your screen and click “Template”.
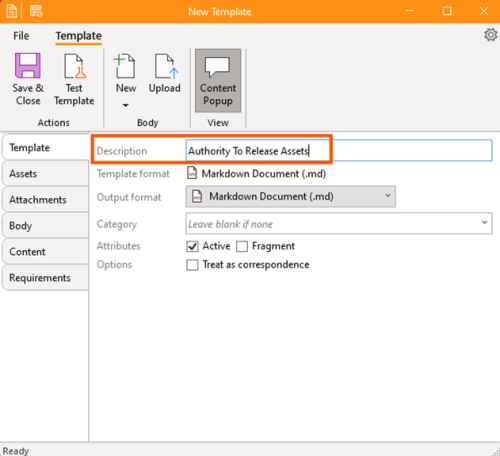
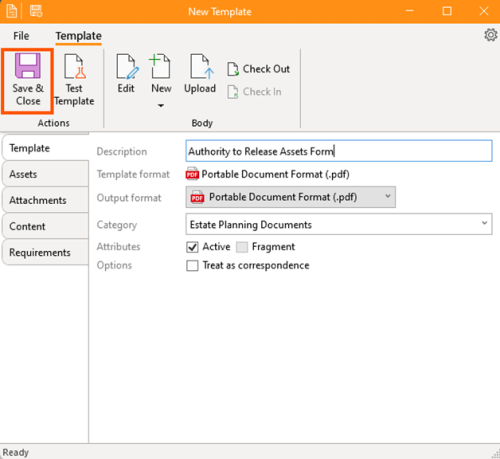
- Both options open the “New Template” window. The "Description" field is the name of the template.
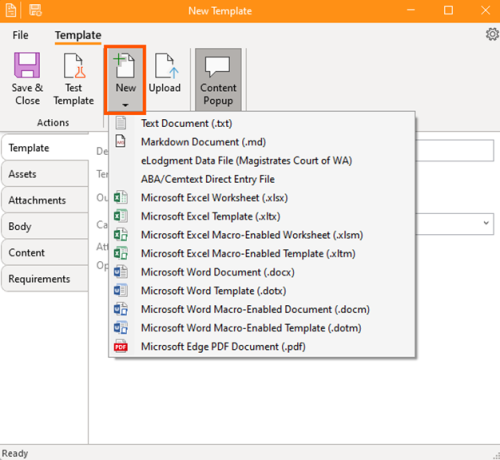
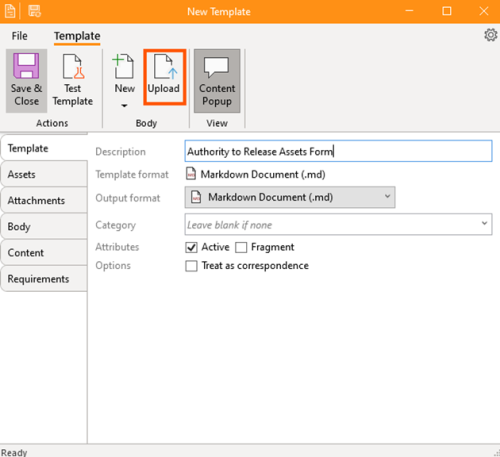
- There are two ways to build a new template: either selecting "New" and selecting a file type to create a completely new template. Alternatively, you can use the "Upload" button to upload a document from your computer and use that as a basis for your template.
- Select your desired options:
- Category: this option is for the purpose of grouping similar templates together (e.g. "Correspondence" or "Banking Documents").
- Attributes - Active: selecting this will make the template appear on the list of templates. Unselect this to hide the template from the active template list.
- Attributes - Fragment: Fragments are essentially templates that can be included inside other templates, for example, letter headers and signature blocks.
- Options: Designating the template as correspondence will allow the software to treat the template as such with additional functionlity.
- Ordinarily the next step is to edit the body of your template. Do this by clicking "Edit". This will open the document in the native editing application e.g. Microsoft Word (.docx) and Adobe Acrobat (.pdf).
- When editing the document, you need to identify where you want data from ContactsLaw to be drawn upon. These areas are then identified using "Content Markers". Content Markers can be Insertion Points and Blocks - more information about these are available in Document Template.
- Microsoft Word (.docx) and most other formats In Microsoft Word, a content marker is created using curley brackets (that is: { and } ) with a custom identifying name inbetween. If you reuse the same identifying name, the system will treat this as one content marker. For example: {ClientFirstName} and {ClientDOB} would be good examples of simple content markers. Note that the name inbetween the brackets does not itself draw on the data in ContactsLaw - it is merely an identifier for your reference. The connection to the data is made at a later stage.
- Adobe Acrobat (.pdf) A content marker in PDF documents is created slightly differently. The software treats form fields created by Adobe Acrobat as a content marker. This is usually desirable as existing editable PDF documents can be used as the basis for a template in the first instance, or otherwise, form fields can often be reliably generated in Adobe Acrobat automatically using that software.
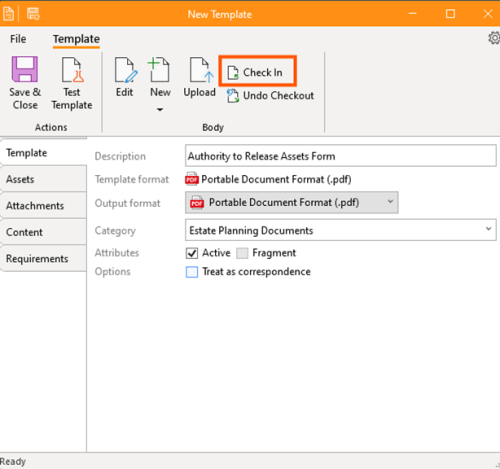
- Once you have finished editing the document, save and close the native editor (Microsoft Word/Acrobat etc). Click “Check In” on the ContactsLaw template editor.
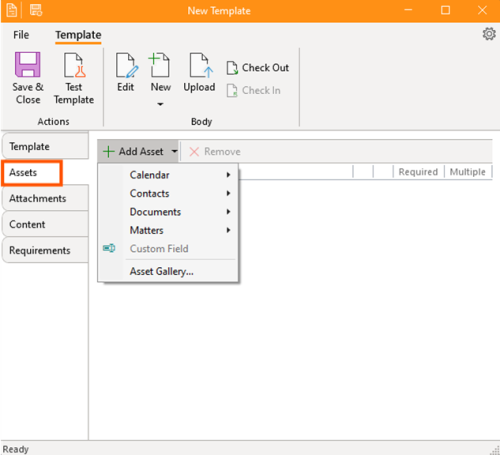
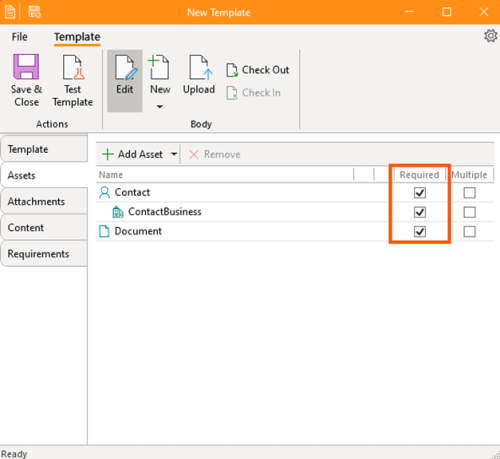
- The first step in connecting the content markers to data in ContactsLaw, you will first need to tell the template editor what Assets the template needs to function. For example, for a bank form to request the release of monies from a deceased person's bank account, you will likely need 2 Contacts - one for the Deceased and one for the Executor. You may also need a Matter and Addresses. Select all the required assets. You can indicate whether the Assets are "Required" (i.e. mandatory to use the template) and whether "Multiple" results can be used in the template (e.g. is you may want your template to permit multiple Executors, but only one deceased person).
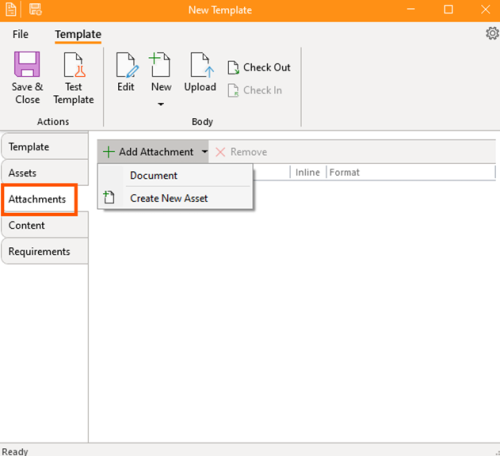
- The "Attachment” section allows you to add particular attachments to a template - this is more relevant for email templates.
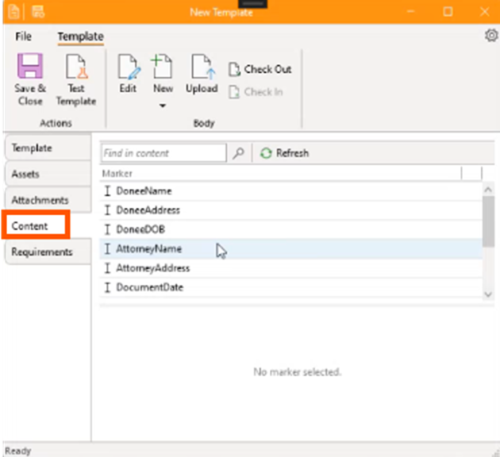
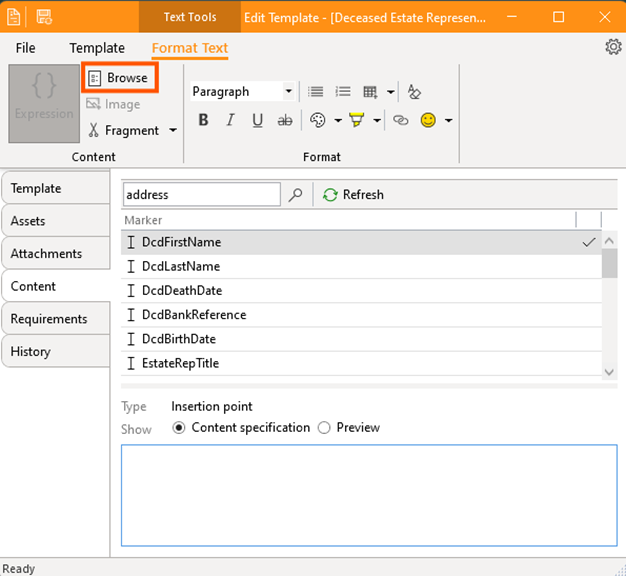
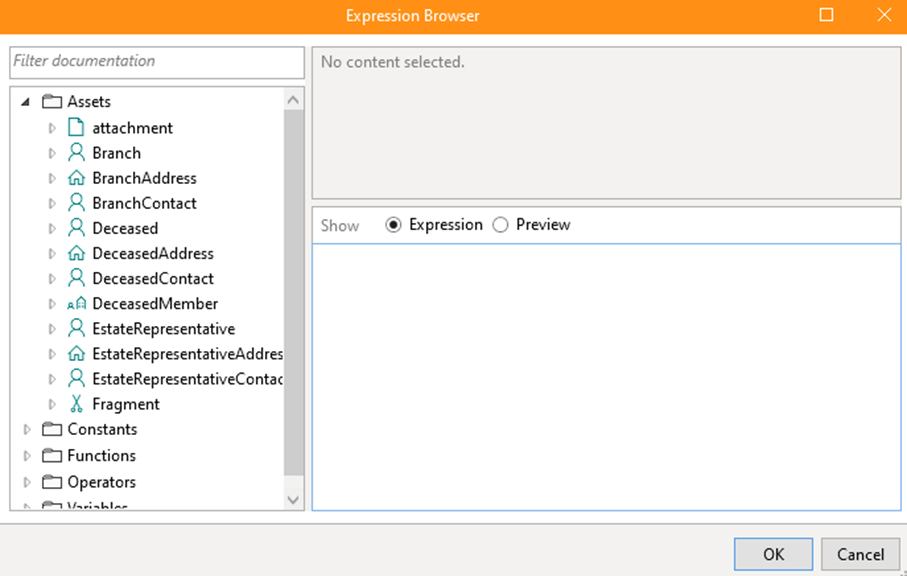
- The “Content” section is where you will connect the Contact Markers in the document to the Assets - and ensure it is formated in the way you want. If you should hit "Refresh" to see all the content markers that have been detected in the document. Proceed to connect the content markers in the document (referring to the Assets selected). The easiest way to do this is to click the “Browse” which will then give you the list of assets and different attributes that can be drawn. Select the asset/attributes for each content field. You can also apply formatting. See Document Template for an explanation as to content fields and formatting).
- The "Requirements" section give you the ability to mandate certain other requirements in order for the template to function. This is optional.
- You can use "Test Template" to test the template using generic data. This will open a version of the template with the content markers willed with generic data. To correct any faults or issues with the template, you can return to the "Content" menu to alter the mappings.
- When you are finished, "Save & Close" the template.
- You will then need to "Configure" your template to work in a particular workgroup or on your subscription. This process allows you to share templates with other ContactsLaw subscriptions and import templates made by other subscribes into your installation and configure them for your particular workgroups, matters and processes.


