How-To:Appointment: Difference between revisions
(Created page with " == How to set and schedule an Appointment == # Open the app and go to the “Collaborate” section and click the “Appointment”. # Add a description, describe the work to be performed. # Add Start date/time and Due date/time # Tick the box if its an “All day event” # Add a Matter # Add a Member/Contact # Save & Close") |
No edit summary |
||
| (7 intermediate revisions by 2 users not shown) | |||
| Line 1: | Line 1: | ||
{{DISPLAYTITLE:How to Schedule Appointments}} | |||
== 1. Getting Started == | |||
Open the [[Desktop App]], navigate to the ''Collaborate'' tab on the ribbon, and select ''New'' ''Appointment''. | |||
[[File:Step 1 - Set Appointment.png|none|thumb|500x500px|''New Appointment'' command.]] | |||
== | == 2. Input Details == | ||
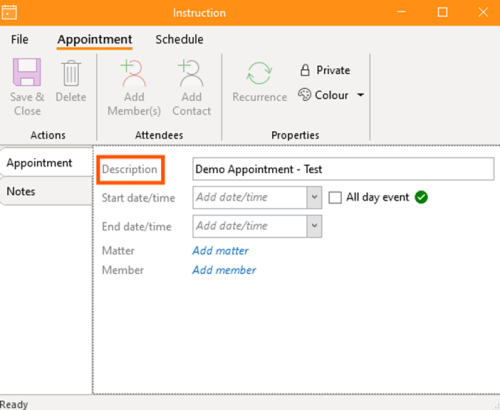
* Provide a ''description'', outlining the work to be performed.[[File:Step 2 - Set Appointment.png|none|thumb|500x500px|Appointment properties showing description.]] | |||
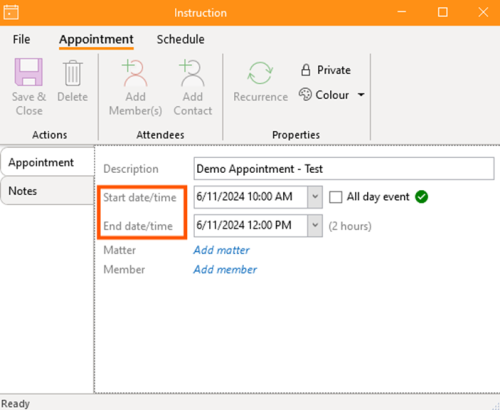
* Enter the ''start date and time'', as well as the ''due date and time''. Tick the checkbox if it is an ''All-day event''.[[File:Step 3 - Set Appointment.png|none|thumb|500x500px|Appointment properties showing start/end dates.]] | |||
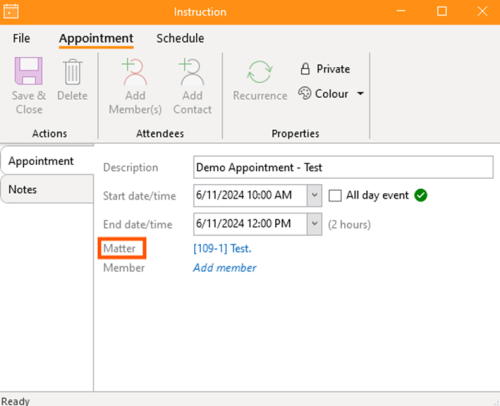
* Associate the appointment with a relevant [[matter]].[[File:Step 5 - Set Appointment.png|none|thumb|500x500px|Appointment properties showing matter.]] | |||
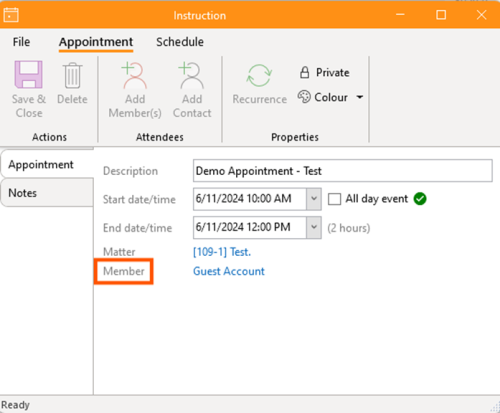
* Add attendees ([[Member|members]] or [[Contact|contacts]]) to the appointment.[[File:Step 6 - Set Appointment.png|none|thumb|500x500px|Appointment properties showing member.]] | |||
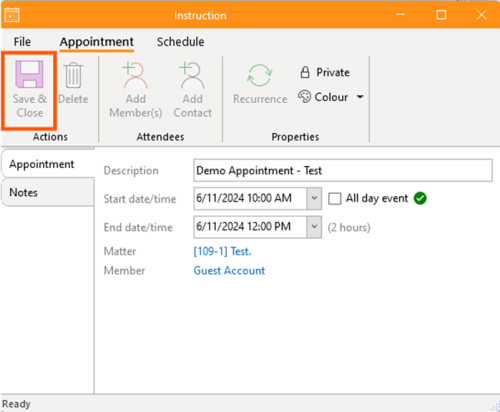
Once all necessary information has been added, select "Save & Close" to finalise the appointment. | |||
[[File:Step 7 - Set Appointment.png|none|thumb|500x500px|''Save & Close'' command.]] | |||
[[Category:How-To]] | |||
__FORCETOC__ | |||
Latest revision as of 11:46, 12 March 2025
1. Getting Started
Open the Desktop App, navigate to the Collaborate tab on the ribbon, and select New Appointment.
2. Input Details
- Provide a description, outlining the work to be performed.
- Enter the start date and time, as well as the due date and time. Tick the checkbox if it is an All-day event.
- Associate the appointment with a relevant matter.
- Add attendees (members or contacts) to the appointment.
Once all necessary information has been added, select "Save & Close" to finalise the appointment.


