How-To:Record Time: Difference between revisions
(Created page with " == How to Record Time == # Open the app and go to the 'Billing' section. # Click the down arrow and select "Record Time". # The recording starts automatically when the window opens, but you can pause it as needed. # Set the date and start time for the recorded time entry. # Specify the matter related to the time entry. # Add a product instance associated with the matter. # Include a description to detail the work performed during the recorded time. # Add any relevant m...") |
No edit summary |
||
| Line 2: | Line 2: | ||
== How to Record Time == | == How to Record Time == | ||
# Open the app and go to the 'Billing' section. | # Open the app and go to the ''''Billing'''<nowiki/>' section.[[File:Step 1 - Create Invoice.png|none|thumb|500x500px]] | ||
# Click the down arrow and select "Record Time". | # Click the down arrow and select "'''Record Time'''".[[File:Step 2 - Record Time.png|none|thumb|500x500px]] | ||
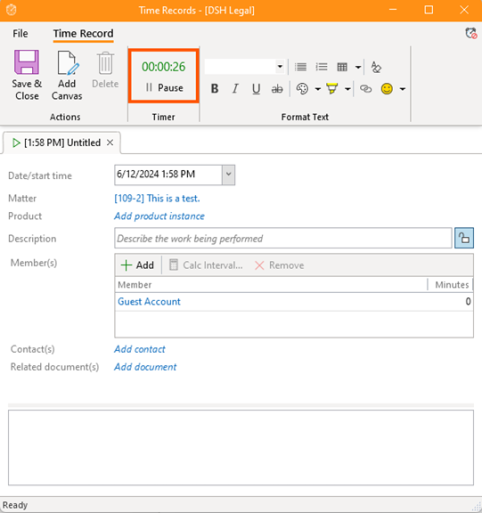
# The recording starts automatically when the window opens, but you can pause it as needed. | # The recording starts automatically when the window opens, but you can pause it as needed.[[File:Step 3 - Record Time.png|none|thumb|513x513px]] | ||
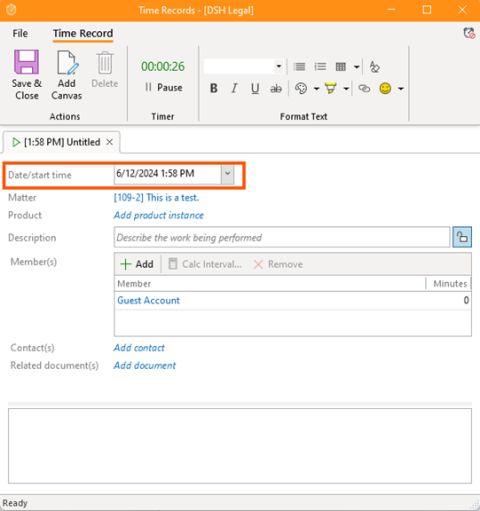
# Set the date and start time for the recorded time entry. | # Set the '''date''' and '''start time''' for the recorded time entry.[[File:Step 4 - Record Time.png|none|thumb|511x511px]] | ||
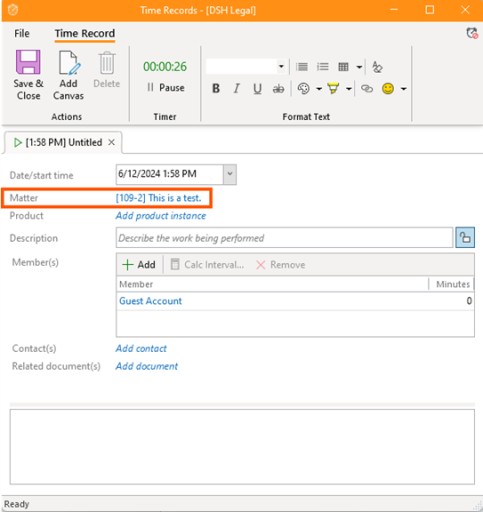
# Specify the matter related to the time entry. | # Specify the matter related to the time entry.[[File:Step 5 - Record Time.png|none|thumb|512x512px]] | ||
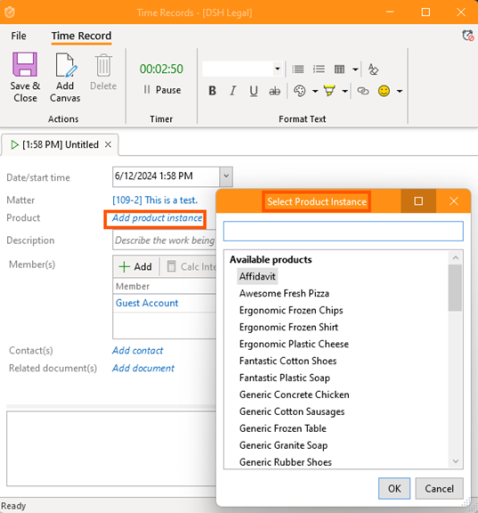
# Add a product instance associated with the matter. | #Add a '''product instance''' associated with the matter.[[File:Step 6 - Record Time.png|none|thumb|513x513px]] | ||
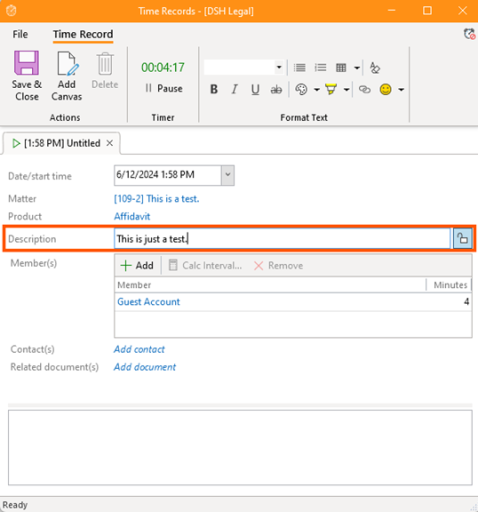
# Include a description to detail the work performed during the recorded time. | # Include a '''description''' to detail the work performed during the recorded time.[[File:Step 7 - Record Time.png|none|thumb|512x512px]] | ||
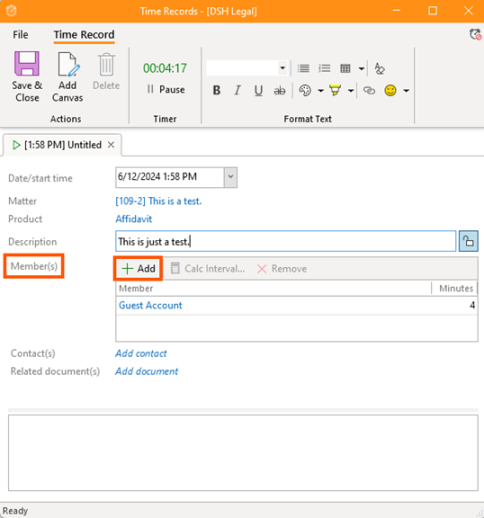
# Add any relevant members involved in the task. | # Add any relevant members involved in the task.[[File:Step 8 - Record Time.png|none|thumb|518x518px]] | ||
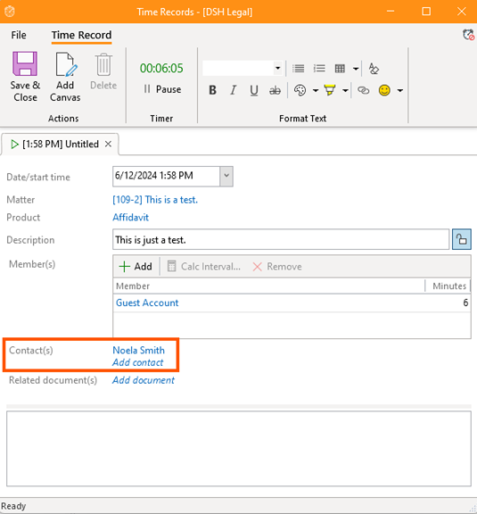
# Optionally, add contacts related to the time entry. | # Optionally, add contacts related to the time entry.[[File:Step 9 - Record Time.png|none|thumb|514x514px]] | ||
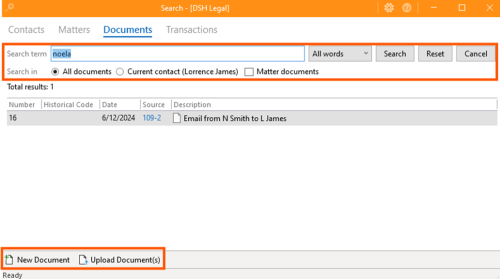
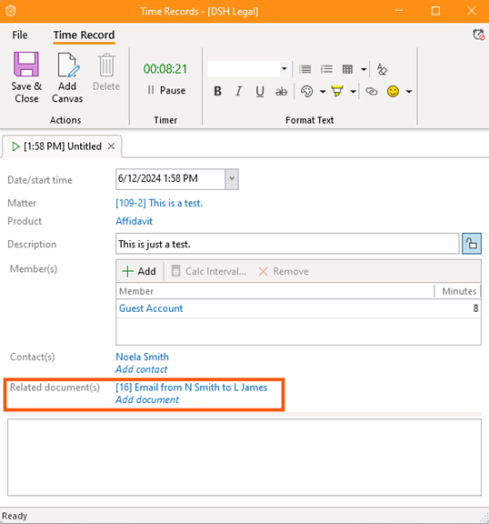
# Attach any related documents or files to the time entry. | # Attach any related documents or files to the time entry.[[File:Step 10 - Record Time.png|none|thumb|500x500px]] | ||
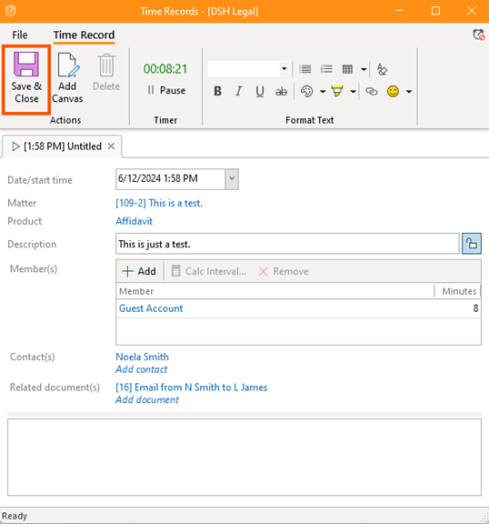
# Click "Save and Close" to finalize the time entry. | # Click "'''Save and Close'''" to finalize the time entry.[[File:Step 11 - Record Time.png|none|thumb|524x524px]][[File:Step 11.2 - Record Time.png|none|thumb|524x524px]] | ||
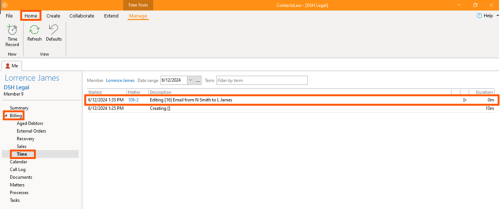
# The recorded time will be accessible under the 'Billing' section, specifically in the 'Time' category. | # The recorded time will be accessible under the ''''Billing'''<nowiki/>' section, specifically in the ''''Time'''<nowiki/>' category.[[File:Step 12 - Record Time.png|none|thumb|500x500px]] | ||
Revision as of 10:55, 17 May 2024
How to Record Time
- Open the app and go to the 'Billing' section.
- Click the down arrow and select "Record Time".
- The recording starts automatically when the window opens, but you can pause it as needed.
- Set the date and start time for the recorded time entry.
- Specify the matter related to the time entry.
- Add a product instance associated with the matter.
- Include a description to detail the work performed during the recorded time.
- Add any relevant members involved in the task.
- Optionally, add contacts related to the time entry.
- Attach any related documents or files to the time entry.
- Click "Save and Close" to finalize the time entry.
- The recorded time will be accessible under the 'Billing' section, specifically in the 'Time' category.


