How to Transfer Funds from Trust to Debtors
This section of ContactsLaw provides the instruction of transferring funds that have come through bank transactions or various payment methods. This structure ensures that financial records and transactions are organised clearly and efficiently for each business you operate.
In the previous articles we covered how to record receipts, money coming into an account, and money going out of an account. For this section, we will show what we do when we transfer funds from trust to general covering all those aforementioned transactions in a single process.
The below guide will explain how to transfer funds from trust to general:
1. Getting Started
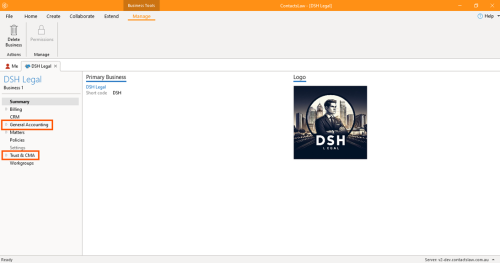
- Navigate to the ribbon group and proceed on My Business.
- Then, there are two (2) different ledger accounts in ContactsLaw, namely Chart of Accounts, which is where the business is going to do a lot of its own internal accounting and then the trust and control money or trust & CMA.
- To proceed to the next steps, there must be an unpaid invoice as it is the primary reason why you would transfer funds from trust to general.
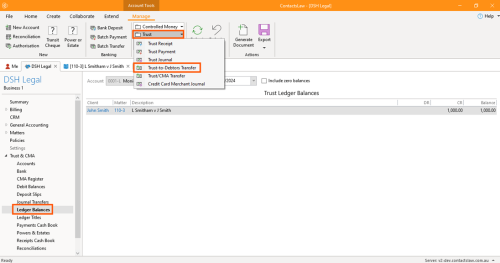
- Dropdown the Trust & CMA and click on Ledger Balances.
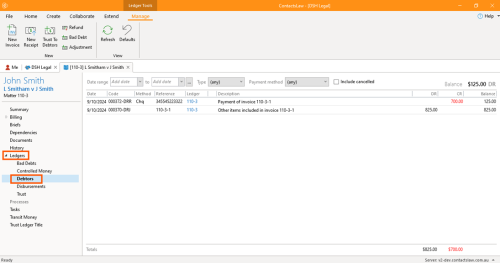
- Click the matter, proceed to Ledgers and choose Debtors.
2. Multiple Ways to Open Trust to Debtors Window
- The below guide will show the different ways that we can get into the transfer activity.
- Option 1: If you follow the previous steps, just proceed in navigating the editor group and click Trust to Debtor.
- Option 2: Go back to Ledger Balances and click on Manage. Then dropdown the Trust and choose Trust to Debtor Transfer.
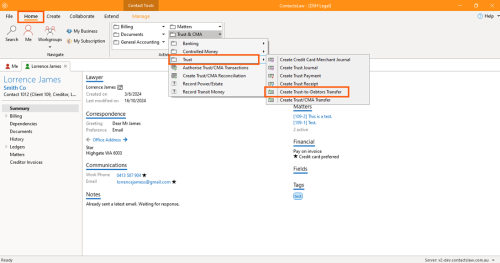
- Option 3: Navigate to ribbon group, click Home. Dropdown Trust & CMA, proceed to Trust and click on Create Trust -to- Debtors Transfer.
3. Specify Options
In this article we will be choosing Option 1 since it is going to pre fill the Ledger with the matter number and other information about the matter.
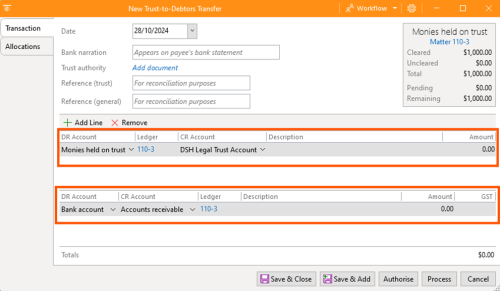
In the Trust-to-Debtors window, there are two sides of the transactions that we are going to simultaneously cover, which is the payment out of the trust account and the receipt into the general account.
- Date: Setting the date when you request the payment. Date can be past, present, or future. There are in some cases there will be backdated transactions or forwarded transactions that actually request the fund.
- Bank Narration: This option will depend on the preference of the person who is filling the transfer.
- Trust Authority: This option includes attaching documents preferably documents that shows that clients authorisedo do the transfer.
- Reference (Trust): This is for the trust account reference number. Reference (General): This is for the general account reference number. Add and Remove Line: Similar to other accounting transactions, the transferring of trust to general also includes an option to add another item or remove an item.
4. Two Sides of the Trust-to-Debtors Window
As mentioned, there are two sides of the two transactions that we're going to simultaneously perform, which is the payment out of the trust account and the receipt into the general account.
The below guide will explain the options under these two sides of transactions:
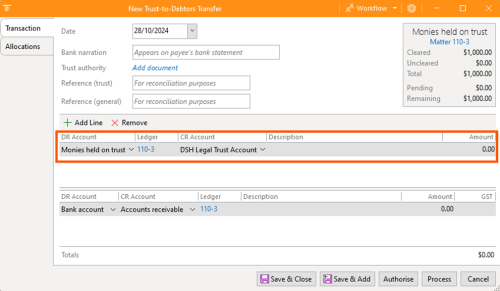
- Side 1: About the Trust DR Account: This option will show where the payment will be directed. This must be under Monies held on Trust.
- Ledger: This is pre-filled if you choose Option 1, for this option must be filled with Matter.
- CR Account: This option is about what account will be going to send this payment. This must be under the DSH Legal Trust Account.
- Description: Describe what the transfer is all about.
- Amount: State the exact amount of the transaction excluding the tax its GST.
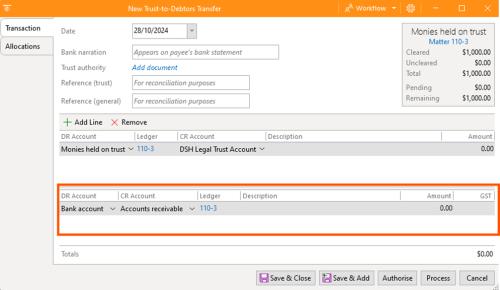
- Side 2: About the Accounts Receivable.
- DR Account: This option will show where the payment will be directed. This must be under the Bank Account.
- CR Account: This option is about what account will be going to send this payment. This must be under the Accounts receivable.
- Ledger: This is pre-filled if you choose Option 1, for this option must be filled with Matter.
- Description: Describe what the transfer is all about.
- Amount: State the exact amount of the transaction excluding the tax its gst.
- GST: This is a set of metrics or base items specific to Australia in the preparation of tax records for businesses which is 10% of the total amount. In case the GST amount is different you have the option to edit it.
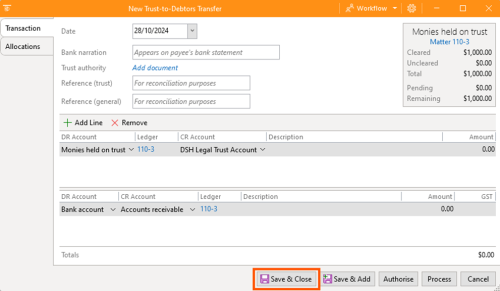
- Review the details and click Save & Close.
4. Final Steps
After clicking the save and close button, the effect will end up with a transactional appearance in gray in the Debtors Ledger, indicating that it has not yet affected the balance on the bank account.
To successfully transfer the fund, we will do the Batch Transfer. This process is very similar to Batch Payments.
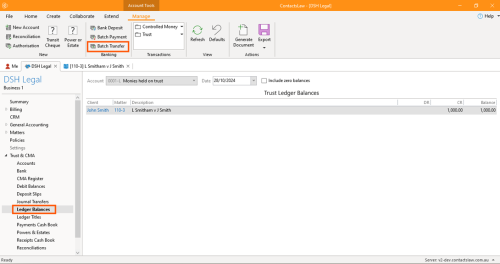
- Go back to Ledger Balances, and navigate to the ribbon group and choose Batch Transfer.
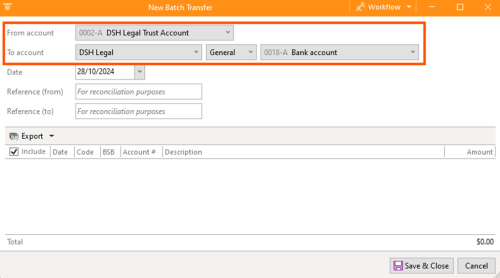
- The editor window shows similar information to Batch Payments. The only difference is that instead of just filtering to show pending payments on a particular bank account, it shows the pending transfers from a particular trust account to a particular general account, and that's going to show a different set of transactions.
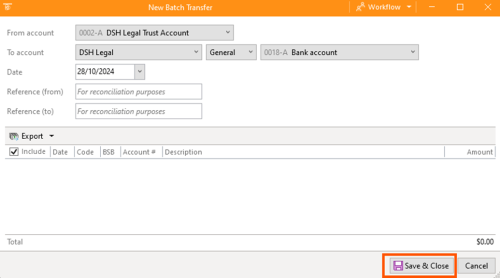
- Review the details and click Save & Close.


